
You will hardly run into a prepper who is not making plans and accumulating gear to be ready for medical emergencies that might occur during or as the result of a disaster.
The mantra that I and others in the sector preach is that one must be prepared to be their own first responder. Doctors, nurses and EMTs will be completely overwhelmed if they are around to help at all, so you have to be ready to do it yourself.
However, there is one component of medical care that is almost universally overlooked by preppers all across the land, and that is dental care. Dental care is about far more than keeping your chompers looking good so you can feel confident and polite society.
Failing to keep your teeth clean and any oral maladies taken care of can eventually lead to excruciating pain and turn life threatening far more quickly than one would think.
The idea of being your own dentist or serving as a dentist for those in your family or group during a long-term survival situation might seem daunting, but just like every other skill you have learned so far it is entirely achievable, at least to an extent they can make a difference when an intervention is called for.
In this article, we will provide you with an introduction to the concepts and fundamentals of SHTF dentistry skill.

For More than Just Social Acceptability
Before we get started, it is imperative that you understand just how important oral health is to overall health.
Sure, keeping your teeth free of plaque and cavities and gleaming pearly white definitely improves your appearance and helps your social life but you have far more at stake practically than socially if you let your teeth and mouth fall into disrepair.
Damaged or badly degraded teeth can no longer do their job of processing food, and even if they can the pain is going to make eating tedious and excruciating, certainly robbing meal time of any Joy and likely depleting your strength physically and emotionally.
Being able to eat easily in a carefree way is something that almost everyone takes for granted.
How much worse will this be in the middle of a survival situation amidst all of the other problems you are trying to deal with?
I would argue it will be pretty bad. when you have to go on living, that means you have to continually take care of yourself so that you can survive and thrive under the circumstances, like it or not. That means you’ll need to take care of your teeth and mouth like any other part of your body.
Hygiene is Imperative to Long-Term Survival Situations
As is said, cleanliness is next to godliness, and while keeping it clean in a survival situation won’t necessarily buy you divine intervention, it can stave off problems that you cannot afford under the circumstances.
A body that is dirty will begin to host bacteria in ever-increasing, constantly multiplying numbers. Depending on the type of bacteria and where it is on your body the maladies that might develop and escalate can range anywhere from annoying to life-threatening.
I can start with rashes and topical skin irritations progressing all the way to localized sores and eventually progress to severe infection, infection that will make you terribly ill or even kill you outright.
And we should not discount the nicer side of good hygiene. You and everyone around you are likely to be going through one of the single, worst experiences of their lives, and putting up with a foul and stinky body of another person along with their own is only going to increase stress levels.
A person who is clean and smells good, or at least does not smell terrible, will increase morale, and the mental edge that this can provide must not be underestimated.
BLUF: Poor Oral-Hygiene can be Life-Threatening
Discussing all the many varied and terrible ways that poor hygiene can kill you when you are chronically unclean can be an entire article unto itself, but concerning ourselves only with the hygiene of the mouth a buildup of bacteria will start out making your breath positively foul and eventually progress to the rampant buildup of plaque on teeth, plaque that will weaken them and eventually rot them right out of their sockets.
When the teeth begin to fail the gums will likewise be affected, and an open injury in the mouth to say nothing of a badly dissolved or crumbled tooth can provide an easy method of ingress for infection.
Considering the proximity to the eyes and brain any major infection of the mouth can easily become incapacitating, even fatal, and wholesale infection of the blood supply is not out of the question.
Both the eyes and the brain are considered immunoprivileged structures in the body, meaning a disproportionate amount of the immune system’s resources are dedicated towards monitoring and protecting them.
Typically, this means infections that begin elsewhere in the body will never make it far enough to affect the eyes or brain, but if the infection should start in the tissues very near to either, that is another story…
Accordingly, you mustn’t let neglect of your mouth turn into an easy vector for infection.
Hit the Books!
Chances are you aren’t a dentist, and you probably aren’t even a dental assistant. The chances are good, however, that you have a baseline level of experience in dental hygiene, you brush your teeth, floss, gargle mouthwash and so forth; your basic twice-daily care routine.
That’s good, and you’ll still need to do all of those things but it isn’t enough for our purposes.
To be truly prepared for post-SHTF dental requirements you’ll need a sampling of skills from various dental disciplines, including those of a dental hygienist, dentist and even a little bit of orthodontics know-how.
Sound intimidating? Maybe it is, but don’t be: These are skills that professionals spend years acquiring and a lifetime mastering, and it just isn’t practical for most of us to devote any significant amount of time to them unless we are actually practicing professionally.
But for mastering key concepts and learning fundamental skills, you can do the same thing that you have already done for other, less cringeworthy skill sets- Hit the books!
And by “hit the books” I mean actually crack open dental manuals, watch pertinent videos on YouTube and other sites and even see if you can track down any training for austere environment dentistry from a genuine practitioner or even an NGO devoted to the purpose.
Having even a little bit of practical experience under your belt will go a long way towards reducing fear and boosting confidence in a live “event,” and barring that even some sound theory and knowledge could make the difference.
No more excuses, time to skill up!
Your Two-Pronged Approach to SHTF Dental Care
Generally, you will prepare for post SHTF dental care and crisis intervention as two distinct but related sets of skills and supply requirements.
- Basic Upkeep
- Corrective/Emergency Procedures
Covering the basics is easy, and you might well have all of the supplies you need already, but taking care of the second category is significantly more involved, and more difficult.
Nonetheless, you must do both if you want to be truly ready for all eventualities. Below you will find sections about each category along with lists of materials, tools and supplies helpful for the purpose.
Basic Upkeep – Supplies, Do’s and Don’ts
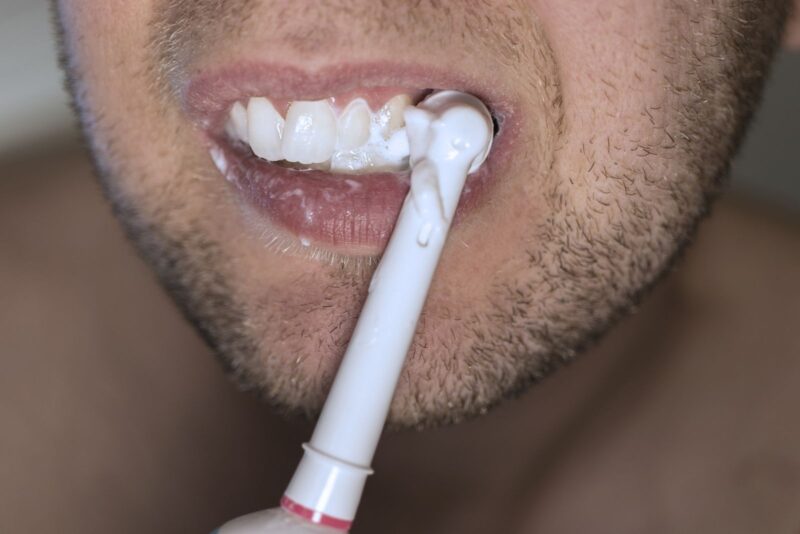
No surprises here, your basic oral care and upkeep routine will not change much if at all post-SHTF. You’ll still need to brush, you’ll still need to floss and generally try to avoid things that are really hard on your teeth.
Some facets of your routine might change, for instance, if you use a waterpik or electric toothbrush you’ll be switching to manual equivalents in the absence of electricity or in an austere environment or electricity is precious.
Your list of supplies will probably contain no surprises, and you generally want to have on hand enough dental care tools and provisions to take care of yourself, your immediate family and anyone else in your group that you are responsible for:
- Toothbrushes
- You should include standard toothbrushes for everyday use as well as interdental toothbrushes. Interdental toothbrushes are tiny, straight pieces of wire designed to fit between teeth, and have a spiral of bristles sticking out in every direction. These are terrific for supplementing your flossing routine as well as cleaning around braces or sensitive areas that traditional brushing cannot reach.
- Toothpaste
- Mouthwash (optional)
- Floss
- Baking soda
- Baking soda is a multipurpose item for oral care, capable of being used as toothpaste, diluted into a mouthwash and used as a debriding agent. If you run out of any of the other items on this list you’ll be glad you have it!
- Clove Oil
- Clove oil works as an excellent oral anesthetic for sores, cuts and even pain from cavities. Soaking a cotton ball in clove oil and then holding in place for 30-60 seconds is often all that is necessary to provide meaningful relief. Take care that you do not swallow any of this stuff; you won’t forget it!
- Coconut Oil
- Coconut oil is another wondrous, natural inclusion to your daily dental routine, and is possessed of strong antimicrobial properties as well as a highly moisturizing nature. It is helpful for keeping your breath fresh, gums moisturized, and preventing the buildup of plaque and tartar on teeth. A must-have for dealing with lesser injuries and ailments of the mouth and gums, and kept in a cool location out of direct sunlight it can last up to two years in storage.
When it comes to doing your daily brushing, depending on the situation you may or may not have a surplus of water to use for rinsing.
That’s okay, as most toothpaste only need to be slightly wet in order to work properly and if you cannot spare the water to rinse you can just spit out the foamy toothpaste as best you can and then go on with your day.
Not entirely pleasant, but completely serviceable for the purposes of keeping your teeth and mouth in good shape.
Corrective Procedures – Supplies, Do’s and Don’ts
- Tooth fixative
- Adhesive used for repairing chipped or broken teeth, or attaching fixtures to teeth.
- Emergency tooth preservation kit
- This is a kit containing a disinfectant rinse, preservation solution or gel and a container to safely transport a completely dislodged tooth until it can be reinserted into the socket.
- Filling media
- Used for the creation of temporary or permanent fillings. Temporary fillings work well for halting the pain from cavities, but permanent and semi-permanent fillings must be installed with care and skill.
- Scaler and scraper tools
- Dental picks
- Extraction forceps
- A fancy term for tooth-pulling pliers.
- Periosteal elevator
- A cutting tool used alongside extraction forceps. This thin chisel-like implement is designed to reach down into the gum line and sever the tissues holding a tooth in place.
- Dental mirror
- Dental spatula
- Probe
- Temporary tooth/denture media (TempTooth)
- Used to DIY mold removable teeth or dentures to replace lost or missing teeth. Can alleviate discomfort when eating and improve morale.
- Facemask
- Gloves
- Headlamp or head mirror
- Gauze pads and rolled gauze
***Caution: Using any of the above tools for their intended purpose entails a certain amount of risk, as they are designed to be used by trained individuals in a proper dentistry setting. Undertaking any amateur dentistry entails risks that are inherent to the procedure, and should only be attempted by those with the knowledge and experience to do so safely.***
When brushing and flossing isn’t enough, or when mishap results in a badly damaged tooth, it is time to break out the big guns, or rather the big tools.
The pick, scraper and scaler tools on the list above are used for the removal of plaque and tartar. Dental fixative, sometimes called tooth adhesive, is used for the temporary repair of damaged teeth until proper care can be obtained.
Dental fixative is little more than an adhesive or cement which is safe to use and the mouth and will reliably bond teeth together. A small chip or a cracked tooth can be shored up using dental fixative.
Upon the removal of plaque or tartar, a cavity can be filled using a variety of filling media and associated spatulas. Care must be taken using either to ensure that surrounding teeth are not contaminated or otherwise impaired.
The really intimidating item on the list above is, of course, the ominously named extraction forceps. AKA Tooth-pulling pliers. These pliers are designed to safely grip a tooth destined for removal without crushing it, a mishap that can make a bad situation so much worse.
These tools are essential for dealing with badly rotten teeth or any others that must come out, and attempting to use common pliers, vise grips or any other such improvised device is likely to result in disaster.
Lastly, gloves and facemask will keep any amateur procedures as hygienic as possible and reduce the risk of infection. A headlamp or head mirror is essential for getting as much light as possible on the work area.
Lastly, temporary or improvised dentures or single replacement teeth can be made surprisingly well and effectively using polymer intended for the purpose.
Temp-Tooth is one such product consisting of temperature sensitive beads which will soften into a tacky rubber consistency after being soaked in very hot water.
Working quickly, a small quantity can be safely inserted into the mouth once wounds have healed and then molded into a prosthetic that will fit in the place once occupied by the removed tooth.
As always, there is no substitute for training and experience, and if you are forced to use any of these tools and learn while you go, both you and your patient will be in for a harrowing experience.
Dealing with Common Dental Emergencies
There are all kinds of dental emergencies that can occur, from abscesses and impactions to traumatically broken or otherwise damaged teeth.
Two of the most common that require intervention are an avulsed tooth (a tooth knocked completely out) and tooth extraction, “pulling” a rotten, badly broken or otherwise problematic tooth.
These two are among the most likely and most distressing, while also being two dental problems that can be successfully intervened upon by a reasonably skilled prepper.
Note that each of these events are legitimate dental emergencies, and if there is any way to reach a professional dentist or other dental professional you should do so.
Avulsed (Knocked Out) Tooth
Teeth can get knocked out for all kinds of reasons. Accidents, physical combat, roughhousing; it doesn’t matter why, what matters is that immediate action is taken to locate, preserve and reinstall the tooth so that there is a chance it will successfully “re-anchor” in the socket.
Knowing what to do and how to act can save precious time, as an avulsed tooth that is left unprotected will quickly experience pulp death, ruining any chance of a save.
If a tooth gets knocked out, do the following:
Step 1: Locate the tooth
Whatever has happened, locate the tooth if it has fallen out of the victim’s mouth.
Note that the tooth might have broken with some remaining in the socket of the gums. If you cannot find the tooth, none of the other steps matter.
Step 2: Pickup tooth by crown/enamel
When picking up the tooth or its components, take all pains to pick it up carefully by the crown (exposed) part or the enamel if the tooth is broken.
Touching the pulp or other tissues is a great way to cause infection from bacteria on your hands that can spoil your attempt at a successful reinstallation. Use gloves if you have them.
Step 3: Rinse tooth
Rinsing the tooth is essential to help prevent contamination and tissue death. Use a purpose-made cleansing rinse out of your tooth preservation kit if you have it, saline solution or failing everything else the cleanest, room temperature water you can find.
Step 4a: Reinsert tooth (If whole)
If the tooth is whole and intact and the damage to the mouth is relatively minor, try inserting the tooth gently into its socket. Biting down gently can help hold it in place. Judicious use of pain-killer or clove oil can help to manage pain.
Step 4b: Keep tooth moist (if reinsertion is not possible)
A tooth that dries out will experience tissue death quickly. Place the cleaned tooth inside the solution or gel found in your preservation kit or, barring that, saline solution.
Step 5: Splint tooth
Splinting the tooth is a procedure done to hold a reinserted tooth in place so that it can heal and, hopefully, reattach to the gums and go on living.
This is done with various apparatus and adhesives and should, ideally, be done by a dentist or orthodontist. You may need to improvise in a jam.
Step 6: Protect tooth for reintegration
A reinstalled tooth should not be exposed to much if any pressure from chewing, extreme heat or cold, acidic food, or anything else that might harm it.
It should be kept clean and rinsed, and antibiotics might be called for to prevent infection which will surely result in the loss of the tooth should it occur.
Note that all of the above assumes the tooth can be reinserted in more or less one piece, and that the tooth was not broken off with remnants still in the socket.
In that case, barring the attention of a skilled dentist or orthodontist, what you are really dealing with is an extraction (see next section).
Never try to force or otherwise mangle a tooth back into position; if it cannot be cleanly refitted, you are likely to cause more harm than good.
The Big One: Pulling a Tooth
Note that the instructions below are procedural for a person who is extracting a tooth from someone else. Extracting your own rotten tooth can be done, but worthwhile instructions for that procedure are beyond the confines of this article.
Check out one of our other articles here for even more info on handling this hair-raising procedure. Godspeed at any rate!
Step 1: Don personal protective equipment
Time to do this. Put on your face mask, gloves, headlamp or mirror and sweatband if you need it.
This isn’t just to comfort your patient; you must do everything you can to reduce the risk of infection since they’re about to have a gaping, open wound in their mouth that is easy to infect and the best of times.
Step 2: Position the patient
Do a few dry runs, preferably not on the patient, to determine the best working height and angle for you. Remember, it will be imperative that you obtain a straight shot to reduce the risk of damaging neighboring teeth.
Step 3: Apply anesthetic, if available
If there was ever a time for anesthetic, this is it.
Step 5: Use periosteal elevator to loosen ligaments holding tooth in place
Expect some bleeding to begin. Keep the area around the tooth as clean and dry as you can using gauze and an occasional spritz of water so you can see what you are doing. Try not to let blood begin filling up in the mouth of the patient.
Step 6: Grasp tooth with extraction forceps
Ensure that your hands are dry and you have a good grip on the handles of the forceps for the next step.
Step 7: Remove tooth by pulling directly upward/downward out of socket
Extract the tooth by pulling it directly upward or downward out of its socket as appropriate. Do not use a rocking motion if it can be avoided. Using a rocking motion increases the chances of damaging or loosening the neighboring teeth.
An exception to this is made when the tooth is most of the way out of the socket or in the case of the rearmost teeth.
Step 8: Ensure that all parts of tooth are removed
As before, use a periodic rinse and plenty of gauze to control bleeding and keep the site clear so that you can see what you are doing.
Step 9: Control bleeding
There will be lots of blood in the aftermath of an extraction, whether it comes out in one piece or not.
Step 10: Perform follow-on care, ensure that patient does not damage or dislodge blood clot
The patient must be monitored for subsequent infection, though swelling, pain and even significant bruising of the mandible or face is likely.
Cultivating Skilled Practitioners for Your Survival Group
Lots of preppers who get turned on to the seriousness and importance of this skill set naturally set about fostering your own skills and procuring their own equipment for the task.
This is undeniably a good thing, but a better approach and one with a much higher degree of efficacy is obtaining a skilled dental technician or actual dentist for your survival group.
This is not necessarily your family dentist or orthodontist. This person is someone that you can build serious rapport with and is of like mind when it comes to personal readiness and the topic of survival.
Having someone who has done all of this before, day in and day out, will drastically improve the chances of a successful outcome and minimize the chances of mishap, to say nothing of doing the whole thing with less pain and trauma for the patient.
If you have a friend, friend of a friend or a family member with any of the above skill sets they are a natural shoe in for the role but you might be able to cultivate a person to fit into your group by meeting the right people and making the right connections.
In fact, it is not out of the question that your dentist or a technician at your dentist’s office might be on board with the idea if you are able to make small talk with them about mutual interests, particularly mutual interests revolving around prepping.
Most groups have a leader, a mechanic, a rigger and a fighter, and many other specialists besides so it is only natural you should try to include a dentist in the fold.
Your teeth will thank you, and you’ll be thanking your lucky stars if you have a dentist at your elbow instead of an enthusiastic amateur when a bad tooth needs to come out!
Conclusion
Dentistry skills and supplies are an often overlooked component in a prepper’s readiness plan. Failing to take care of teeth in the long term can lead to serious dental maladies, including dangerous infections that can prove show stopping under the rigors of survival.
Take it upon yourself to learn fundamental dental care and intervention techniques in case you find yourself in the gravest extreme, and all preppers would be wise to cultivate a close contact or group member in the form of a dental technician or actual dentist.
Like what you read?
Then you're gonna love my free PDF, 20 common survival items, 20 uncommon survival uses for each. That's 400 total uses for these dirt-cheap little items!
We will not spam you.