
Preppers spend an inordinate amount of time packing, customizing, and generally fussing over their bug-out bags.
This is understandable, as the bug-out bag is a central and crucially important prep in all kinds of scenarios.
Whether you are facing a calamitous natural disaster or a man-made catastrophe, your bug-out bag, bristling with precious gear and supplies, will be there to equip, arm, and sustain you.
Considering how much work goes into assembling and perfecting a BOB it is understandable that most people would leave well enough alone when they get it just right according to their needs and wants.
That being said, we should never allow ourselves to become convinced that anything cannot be improved upon.
This includes our precious BOB’s. A few ounces saved, a little additional capability or just creature comfort improvements all add up to making you more efficient when the rubber hits the road.
Your BOB was only “perfect” yesterday; today is a new day and that means new opportunities for improvement.
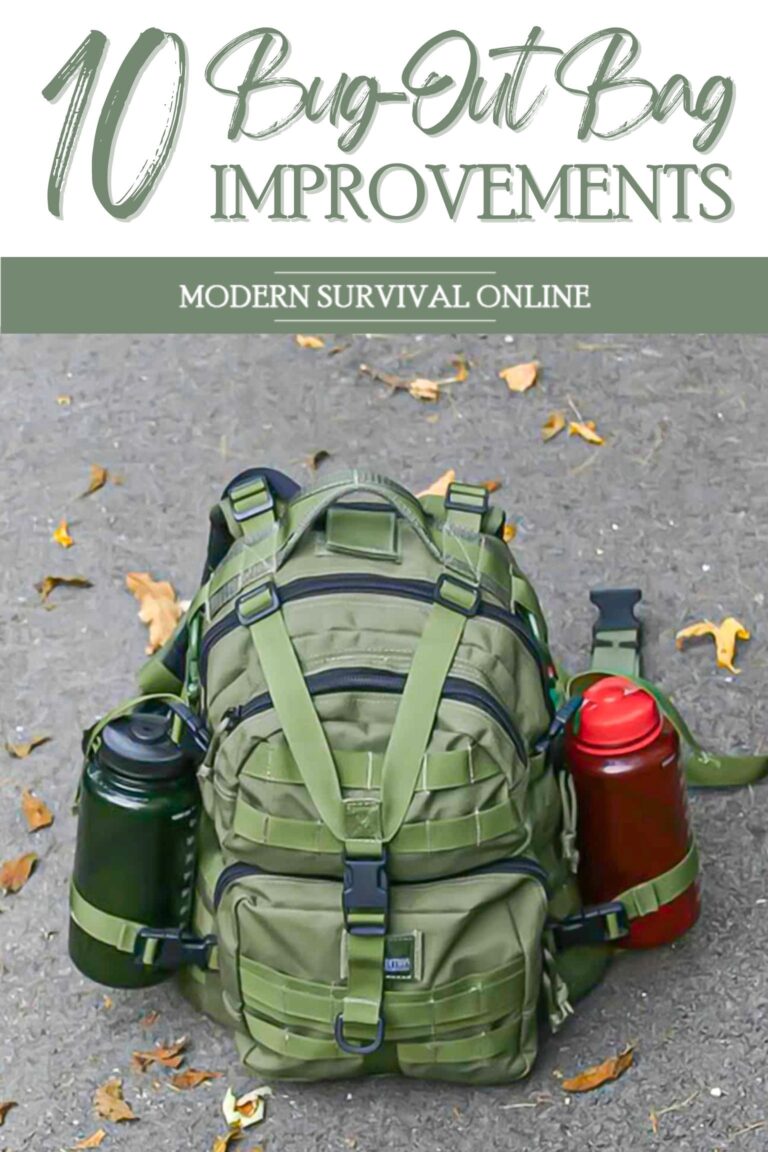
With a little know-how and a new point of view, you might discover a way to improve your pack beyond the typical. In this article we will share with you 10 methods for upgrading your trusty BOB.
1. Improve Belt, Straps, and Frame
This is a great upgrade for anybody, no matter what kind of BOB you have. Well, unless you have some itty bitty day pack-sized BOB in which case it probably is not a BOB at all.
Some of the most important components in your bug-out bag as a system are the parts that come into contact with your body, the ones that allow you to carry it and stabilize it.
Think of these as your interface with the pack; the straps, the belt, and the frame, if your pack has one.
If any of these systems are substantially defective in any way your user experience is going to suffer.
That means you will suffer and you’ll expend more energy to carry the same load over the same distance, under the same conditions.
A belt that slips around or is insecure, thin, biting, or flimsy straps, and a weak frame that digs painfully into your shoulder blades are not going to do you any favors.
Don’t skip on upgrading any of these components assuming you really like the pack itself and it does the job otherwise.
Many modern packs are semi-modular in nature and you can easily change out the belts or frames and potentially even the straps.
Some components are even designed in such a way that you can upgrade the foam padding in these parts according to your desires.
Believe me when I say that any quibbling aggravation could potentially turn into a murderous annoyance once you have carried it long enough, so don’t skimp on these upgrades.

2. Waterproof It
You’ll hear plenty of talk out of preppers about how they are ready to bug-out come rain or shine, thick or thin, no matter the conditions.
They might talk tough, and they may even physically be up to the challenge, but is their gear up to the task?
Take it from me; it will never fail that when it is time to get a move on for real the weather will always turn against you.
Heck, it’ll usually do that even when you’re out for a recreational hike or camping excursion! Hauling a fully loaded BOB is trial enough but it can be made exponentially worse when it is raining hard and it starts taking on water.
In fact, you should assume that your BOB is going to be soaking wet unless you do something about it yourself.
There are very few pack manufacturers whose claims of water resistance or outright waterproofness can be taken at face value.
Much of the time when you buy a pack and it makes a bold claim of waterproofness it really means “sheds a little water”.
Fine, if you spill your artisanal Fiji water on it- it will probably handle it just fine. But when it is raining pitchforks you’ll need more substantial protection.
The implications are serious. The nylon that most packs are made of is fairly heavy even though it feels airy light when empty.
It will also absorb water, making it drastically heavier because water itself is quite dense. Worse, all of your precious survival gear you have packed within the BOB will be placed in substantial jeopardy.
Electronics may be destroyed, clothing will be soaked, paper made soggy, and potentially useless.
Any metal components could begin to rust, and rust will ruin them. This of course will add even more weight as your possessions absorb water.
Forget that! You need to waterproof your pack. How you do this is up to you. It could be something as time-tested and reliable as a deployable rainfly or rain cover that completely encloses it.
It might be an improvised solution like a heavy-duty can liner and a little duct tape. It might even call for a little bit of old-fashioned know-how like a coating of beeswax, just like Grandpa used to use, or a modern rain repellent that you reapply periodically.
Whatever solution you rely on make sure you test it and inspect it for performance.
3. Add Redundancy
We have all heard the clichéd adage that two is one and one is none. This is a pithy reminder that anything we need, anything we are counting on, will surely become lost, broken, or worn out during our travels and travails.
Anything important that is worth carrying is important enough to warrant carrying a secondary and perhaps even a tertiary.
As I said, it is definitely a cliché but the thing about clichés is that they became that way usually because they have a core of truth to them.
You need to take stock of your most essential items contained in your BOB loadout and identify the ones that you really, really could not do without under your anticipated circumstances.
Then you need to provide for carrying some backup functionality one way or another.
Popular inclusions in this category could be prepping standbys like fire starting gear, navigational equipment, water filtration gear, shelter supplies, etc.
But do note that I said functionality, specifically, and not necessarily a clone of the item in question.
This is where you can really flex your creative muscles to cover your bases while minimizing your encumbrance.
If you rely on a GPS for navigation you can save weight and space by carrying a backup set of maps and a field compass while knowing how to use both of them.
A water filter is one way to purify water for drinking, but another way to purify it could rely on treating them with steritabs.
Consider this line of thinking in a different context. A .22 rifle makes for a great game-getting hunting weapon and is also formidable on defense.
Carrying an entire secondary long gun will be extremely cumbersome, but you might be well served with a handgun in the same caliber (to share ammo while maintaining capability) or even something like a slingshot which is still a powerful ranged weapon.
With a little forethought, careful planning, and a dash of creativity you can add redundancy to serve as a hedge against loss or breakage while minimizing your equipment burden.
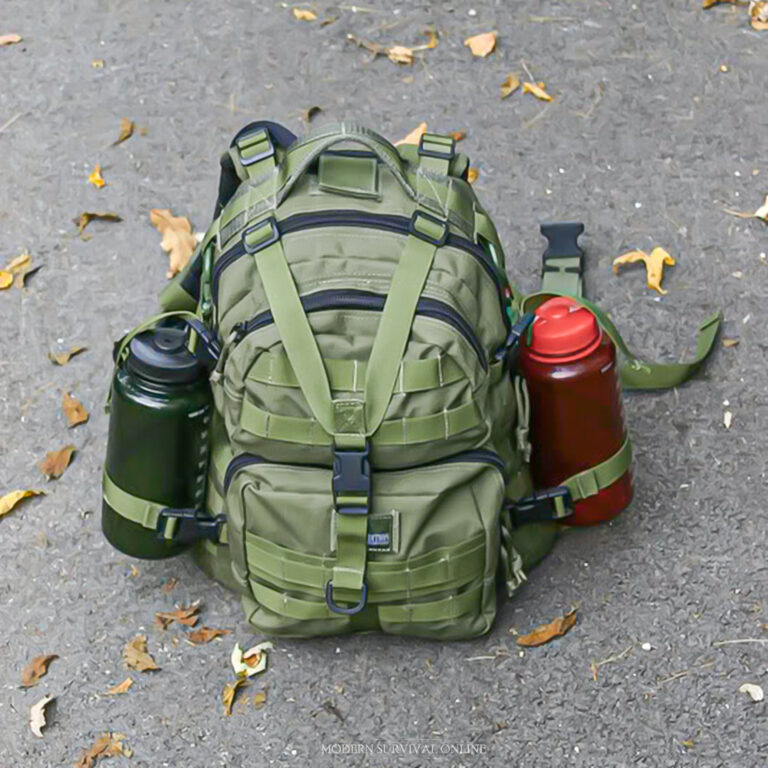
4. Add Onboard Water
Water is absolutely essential to survival. You don’t need me to tell you that but, by golly, I said it anyway.
You should be carrying a quantity of drinking water with your BOB ready to quaff, and this is despite how heavy water is and how hard it is to carry. That is how important it is.
Filtration gear, sterilization chemicals, and all that associated accouterment are fine, but when you need water to drink you need it right now not after a prolonged stop involving multiple steps just to make it safe.
Many of us rely on a variety of hard containers to hold our water. The ubiquitous and ever-present Nalgene is overwhelmingly popular as are a variety of hard canteens and even soft or flexible pouches.
But no matter what kind of vessel you use for holding your water and how you choose to stow it on your pack they almost invariably require you to stop, unlimber the pack, pull out your container and then drink before stowing it and carrying on. That’s fine, but there is a better way.
You should consider adding a hydration bladder to your pack even if it is a small one. The ability to drink on the move without slowing down and without taking off your pack is a huge boost to efficiency and will save energy.
The average BOB is a hefty piece of gear, and taking it off and setting it down only to pick it up and put it on again is definitely going to burn some calories when you do that a dozen or more times over the course of movement.
What if you only had to stop to refill your bladder a couple of times over that same length of time? Those are some significant energy savings!
While it is true that these bladders are notorious for getting grungy and skunky if not kept scrupulously clean and sometimes installation can be a pain they are worth every penny and all the cussing.
I used to be a die-hard when it came to carrying hard water bottles but eventually got fed up and supplemented my bottles with a small 2-quart hydration bladder. I have never looked back!
5. Keep It Quiet
This is one of my favorite upgrades that is usually overlooked by most preppers. Even better, it is one that will cost you no money, or only pennies, and nothing but some of your time, diligence, and effort.
I’m talking about keeping your bug-out bag quiet, and I mean silencing it. Does that make me sound crazy? Far from it, and I’m not talking about doing it just so you can hear your favorite birds singing in the distance.
In the context of a survival situation keeping your bug-out bag and all the rest of your gear quiet is an important part of maintaining noise discipline.
Noise discipline is critical because it affords you better situational awareness of what is happening in the environment around you and it also makes you much harder to detect by anyone or anything that might be listening.
Not for nothing, this is another quality-of-life improvement because now you won’t be listening to a clanking, jangling racket day in and day out.
To accomplish this, you’ll need to get really, really serious about packing your gear with a fanaticism that borders on the insane. There is no noise, no sound, and no friction that is too small to warrant your attention.
If your matches are softly clattering together inside their box you want to address it. The mild clang of your rifle magazines tapping against a plastic hard case will need to be muffled.
Anything and everything that can be silenced, every sound that can be deadened should be attacked with fervor.
If you do your job right you should only hear the squeak and rasp of the material your pack is made from rubbing against your clothing and itself. If you can you should even get rid of that!
Yes, this process is a little tedious and further complicated by the fact you’ll need to commit to memory precisely how you need to pack your chosen load out to accomplish this.
But I can promise you this is an upgrade that anyone can perform and furthermore everybody should perform.
But once you take care of silencing your pack and experience gliding through the trail and across the fields like a veritable ghost there will be no going back.

6. Cut Weight
For anybody who carries a pack for any purpose and for any length of time, this is the mandate absolute.
Shave the weight, cut the pounds, and lighten up by any means possible wherever achievable. This is one of the prime mistakes that beginning backpackers and preppers alike commit.
It is so easy to get sucked into worrying about choosing and packing the right gear to cover every contingency that your weight budget is given nary a thought.
An ounce here, a pound there, and pretty soon you are hauling a mammoth pack that will make for a backbreaking journey and is prone to blowing out.
There are three basic approaches to cutting weight. The first involves the choice of the pack itself. The second involves the choice of gear and the third is choosing what gear to take.
All approaches are viable and you should utilize all of them that you can in order to yield a far lighter pack and load.
Considering the pack itself you must look carefully at its configuration and also what it is made out of.
A modern, streamlined, and high-tech hiking backpack might only weigh a few feathery pounds and add almost nothing to your overall load.
An old-fashioned, heavy-duty military pack or tactical bag made out of dense ballistic nylon will have a fair bit of heft to it even when empty.
It might not sound like much, but believe me, that difference of just a few pounds will make a big difference at the end of the day.
If possible, you should consider upgrading your pack to the lightest model available that will still do the job you want it to do.
Regarding gear, the weight of any given item should be factored into your decision-making matrix prior to purchasing.
Gear that is extremely heavy might not be worth taking no matter how good it’s other quantities if it eats up too much of your margin towards your weight budget.
Gear that is not as good, but reasonably reliable and weighs half as much could be a better choice in the end.
Lastly, choosing what gear to take along, what backups are truly essential, and what contingencies you should be prepared for is an agonizing but mandatory process.
Nonetheless, it is one you must perform to avoid hauling everything plus the kitchen sink and the tools needed to install the sink.
Be ruthless, be efficient, and pretty soon you will have a pack that is lean if not light and you’ll be glad you took the time when out on the trail.
7. Integrate Electronics
One thing’s for certain, times and attitudes are changing. It wasn’t but a few short years ago that many of the most old-school traditionalist preppers still held sway and preached a doctrine of strict avoidance when it came to electronics as part of your survival plans.
The notion was that electronics, for all their advantages, were too unreliable, too fussy, too fragile, and too dependent upon the grid to be dependent for serious survival purposes.
They were only ever a perk or nicety, if that, and these old grognards were certain that the good times would never last when the chips were down.
But, that mindset is rightly going the way of the dinosaur. Our modern electronics, especially ones designed for outdoor use or survival purposes, are die-hard, trustworthy, and extremely efficient, capabilities such that we cannot ignore them.
Even better, we have plenty of our own power generation solutions that are entirely suitable for off-grid use and inclusion in our loadout as a standard part of our kit. This has removed the last excuse when it comes to electronics and a survival context.
You would be wise if your bug-out bag reflected this new paradigm. Your BOB should work with your electronics, not against them.
Your chosen pack should support and protect your electronics while making on-the-go charging and, more importantly, on-the-go access easy.
This could be something as simple as waterproof, shockproof hard cases for devices, batteries, and power banks to specific pouches and cable routing solutions for user-friendliness.
But with this new capability comes a few additional challenges, namely the fact that the bad guys or just interested parties can potentially track the signals emitted by your devices.
That’s a bad day for sure, but the solution is simple: by installing a “faraday” bag (signals blocking pouch) into your BOB you can be assured that no unwanted and unnoticed signals will be leaking out to whoever might be listening.
8. Add On-the-Move Solar
Speaking of electronics and their universally attendant off-grid charging systems, you should consider setting up the exterior of your BOB to attach a solar panel that can grab a little sunlight when you are on the move, even if it isn’t as efficient as properly placing it for maximum gain.
The ideal, prescribed way to use a solar cell is to carefully position it so it is square and true directly facing the sun, and then you move it so that it maintains that orientation as the sun tracks across the sky.
On a good day, and with proper babysitting, you can gobble up a surprising amount of power in a comparatively short period of time. But in general the worse your alignment the less power your solar cells generate.
Despite this, some power gained during a time when you would otherwise not be creating any is always better than no power gained during that time. For this reason you should consider this upgrade.
Using nothing more than some tie downs, paracord, and perhaps a nearly weightless piece of foam board it is possible to attach your solar panel to the exterior of your BOB while routing the cable to a separate power bank, if required, stashed safely on the inside.
It is true that your movements as well as any intervening terrain will have an effect on this charging setup as normal, but this handy trick can significantly shorten the amount of time needed to fully recharge your sales, or even keep your electronics going when they would otherwise be dead.
9. Improve External Storage
One of my biggest prepping pet peeves concerning BOB’s is seeing an abundance of gear and extraneous pouches strapped to the outside of a pack banging and clanking, looking for all the world like a cancerous growth made from the dregs of an army surplus catalog.
“Gypsy chic” may be a thing in certain circles, but we want to keep that out of prepping that’s for sure! Samwise Gamgee, you are not.
I despise this so much because there is hardly anything you can do to make your pack less efficient and more cumbersome, quicker, than this.
It doesn’t help that most backpacks are set up to attach pouches and external gear to the front (their front), moving the center of gravity in the direction that at least needs to go, which is away from your back.
This makes any added weight feel geometrically heavier and also increases your profile in such a way that you are more likely to snag it or stumble and fall.
On the other hand, there is some prime and juicy real estate on the exterior of our pack that we should make use of.
Specifically, any gear that we don’t want in our pockets but still need to access regularly deserves a home on your backpack, on the outside, just not where you are thinking.
The shoulder straps and waist belt are great places to put pouches that can hold a small water bottle, compass, maps, small tools, and so forth.
The top of the pack too is a great location for a small pouch containing a variety of “admin” equipment, things that you need routinely but don’t want to go digging into the pack to access.
Be smart about this and keep all pouches and all exterior equipment as close to your body as possible to maintain your center of gravity.
Done intelligently you can free up space in your pockets and get your pack working even better for you as a total load carriage system.
10. Go Modular
This is another great BOB upgrade that does not get as much air time as it should. Modularizing your BOB is not something you do to the pack itself but rather the equipment that it carries.
This technique, or upgrade, relies on packing your gear into discrete units or batches of similar intent that you then store in dedicated pouches or interior bags ready to be withdrawn all at once.
This greatly eases logistics at the cost of a little internal volume and minimal extra weight.
For instance, all of your medical gear could be kept together in a specific pouch as could your cutlery or mess kits, firearms maintenance kit, and fire-starting kit.
If you rely on quick or improvised shelters say using a tarp, emergency blanket, inflatable sleeping pad, and some twine or paracord that could all be bundled together.
Tools are another category that is ripe for inclusion into a role or tool bag so they stay together.
The sky is the limit when it comes to modularizing your load, and everyone has a slightly different approach.
Some go with item categorization like I do whereas other people batch their things according to situational use, for instance small “boo-boo” or incidental injury medical supplies in a small kit while major trauma supplies are held in another.
If this sounds like a waste of time, space, and weight because you’ve never had a problem with the way you traditionally pack your BOB, I beg you to give it a chance and see if it doesn’t drastically increase your ease of access.
Conclusion
Your BOB might be great, maybe even the best it has ever been, but it could still potentially be better.
Considering how important the bug-out bag is to most survival plans no effort and no investment should be spared in improving your bug-out bag capabilities.
Anything you can do to make it lighter, make it more comfortable, and make it more user-friendly and efficient is time well spent, indeed.
Like what you read?
Then you're gonna love my free PDF, 20 common survival items, 20 uncommon survival uses for each. That's 400 total uses for these dirt-cheap little items!
We will not spam you.