
For many preppers, their vehicle is an invaluable part of their bug out and survival plans. Compared to going about on foot, a motor vehicle provides extraordinary speed, range and carrying capacity, and a nominal amount of protection from the elements.
But aside from being an important conveyance when times are tough, our vehicles also serve day in and day out as a daily drivers, commuter cars, and grocery-getters and family hauler.
Naturally, most of us take this capability for granted, and only start paying attention when things go wrong, wrong enough to bring us rolling to a halt.
Motor vehicles are complicated, and even though innumerable things can go wrong with them it is often the simplest and most visible components that fail and prevent us from hitting the road.
Without question, the most common component failure on any modern vehicle is the tires.
The modern, inflatable rubber tire is a marvel of simplicity, and a surprisingly complex piece of engineering.
We and our vehicles demand a lot from our tires, and knowing your way around them, their specifications, repair procedures, replacement and more is critical if you want to be prepared for dealing with pre-trip or roadside contingencies.
Today we are bringing you a guide that will lay the groundwork for understanding everything you need to know about tires.
Tires are the Most Common Motive System Failure Point
Compared to earlier wheeled vehicles like chariots, wagons and even the prototypical automobiles, our cars today enjoy equally modern wheels, specifically the “attired” wheel clad in a modern, rubber, pneumatic radial.
It is no overstatement to say that the modern tire has had just as much to do with the quantum leap in vehicle performance as anything else.
Providing a soft ride, extremely long service life and reducing the wear and tear on the rest of the motive system and drive train components, the tire is integral to vehicle operation on or off road.
Virtually every single vehicle today utilizes some type of inflatable tire with scarce few exceptions. Every bicycle, every motorcycle, every truck, van and car all use conventional tires.
Big rigs, trailers, heavy equipment and even lightweight lawn equipment all used them. Even airplanes are completely dependent on rubber tires in almost every instance for safe takeoff and landing.
I am not exaggerating when I say that all of our modern vehicles require proper and serviceable tires for safe and reliable operation, and without them, you probably aren’t going anywhere.
If you lose even one tire on a typical four-wheeled vehicle, be it a car or truck, the performance and handling of the vehicle will be badly compromised.
At speed, you are likely to lose control entirely and crash. If you lose more than one tire, meaning more than one goes flat, you will find it extraordinarily difficult to make forward progress at all.
Sure, in a time of uttermost desperation you might run a vehicle at low speeds with flat tires, or even down on the rims of the wheels themselves, but this is likely to cause serious damage and has a high likelihood of resulting in a crash.
No matter what kind of vehicle you are dealing with, and no matter how capable it is when on or off the road you can be assured that any failure from any one of its tires will be enough to severely impair it or even immobilize it.
This makes understanding tires, the limitations, performance envelopes and their expedient replacement, a critical skill for all preppers.
Now, there is an astounding amount of detail and variation in modern tires.
Sizes, types, specifications, performance ratings across all kinds of metrics, special capability or construction and many, many other factors.
Most of this information that a consumer or a technician needs to know at a glance is usually printed or embossed on the sidewall of the tire in the form of an alphanumeric code.
To the uninitiated, this code looks like a string of indecipherable gibberish, but once you become even passingly familiar with the typical contents of this code you’ll be able to determine the capability and suitability of a tire at a glance.
Tire Types
Usually denoted by a one or two character code at the beginning or very end of a tires designation printed on the sidewall, this code will tell you roughly for what category of vehicle a tire is for, or its overall serviceability for full-time or emergency use. The most common codes are as follows.
P – Denotes a tire for a passenger car. Easy to remember.
LT – Denotes a tire used for a light truck, typically employed on pickups and many SUVs.
ST – For “special trailer”, a tire designed for use on larger trailers that may be towed by a typical consumer vehicle.
T – Stands for “temporary”. This code denotes a tire that is intended as an emergency use, compact spare tire, sometimes called a donut.
These undersized tires replace larger diameter tires on the vehicle they are rated for, but are only used for lower speeds over relatively short distances to help a vehicle limp home or get to help.
Tire Sizes
Tire size is another obviously critical characteristic for obtaining optimum performance from your vehicle.
There are a surprising number of size characteristics if you really want to dive deeply into the science of tires, but for our purposes there are just three we are predominantly concerned with:
The diameter of the tire, the width of the tire and the offset.
The diameter of the tire is determined by the wheel it is being mounted to, and is specifically the surface area of the wheel where the bead of the tire will rest when installed.
The width is determined by measuring the inner distance of the tire from bead to bead on either side.
Lastly the offset of the tire is once again determined by the wheel it is being mounted to, measured from the wheels centerline to the mounting surface and is often expressed as half of the previous width measurement.
When examining a common tire for most consumer vehicles, you’ll usually see these three measurements expressed in the order presented- diameter, width, offset- but depending upon the manufacturer and the type of tire this may not always hold true.
Don’t worry; with just a little bit of experience and study you will soon learn to recognize the measurements for what they are and whatever order they appear in a tire’s code.
Tire Duty Ratings
A subcategory of the tire classes listed above, the duty rating further groups tires into specifications based on what type of terrain, conditions or load factors they can be expected to handle with a modicum of safety and efficiency.
This is an especially important factor to understand for consumers, as the duty rating of the tire will inform you if the tire is up to the task that you will demand of it, be it driving in inclement weather, at high speed, or holding up under heavy loads.
Light-Medium Duty
This is a category that covers typical, common tires for most passenger vehicles. Tires in this category are rated to carry between 550 to 1,100 lbs at the drive wheel, for cars, and 1,100 and 3,300 lbs on the drive wheel for trucks and large vans.
Tires in this category or further broken up into various classifications by speed rating. The speed rating details what sort of conditions and speed the tire is rated to handle.
This is important information if you are buying tires for a performance vehicle, off-road vehicle or live in an area with frequent inclement weather.
Snow Tires
No surprises here, snow tires are designed to help the vehicle handle effectively and safely in icy, snowy or wintry mix conditions. Examining these tires you will see large, deep gaps called voids between the raised tread areas.
These gaps are designed to allow snow and slush to be compacted between them before being ejected as the tire revolves, allowing the tread better and more consistent contact with the ground below.
Certain snow tires might be better classified as ice tires because they feature aggressive studs built into the treads that will provide attraction even on a hard packed and slippery snow or ice.
It is worth mentioning that tires of this type are typically regulated in many states because they are notably rough on payment.
Similarly, in areas with seriously hostile cold conditions studded tires might be mandatory.
Regardless of the exact specification, any tire in this category that successfully passes winter traction testing at an official proving ground can feature a snowflake design on the sidewall to complement the tire code.
All Season
All season tires are similar to snow tires and that they are designed to handle on road inclement conditions and accomplish this by having large gaps between the flat surfaces of the tread, or at least larger than typical road tires.
Compared to snow tires above, these gaps are smaller.
Tires in this category are great all-weathers and all-season options for vehicles that might be expected to deal with periodic inclement weather.
Tires in this category will usually feature M+S marking somewhere on the sidewall which stands for mud and snow.
All Terrain
All terrain tires are a good option for daily driver off-road capable vehicles, as they have adequate performance specs off-road but are intended to be relatively quiet, responsible and easy to handle when on the road at highway speeds.
Even better for preppers, tires of this nature usually do pretty well on snow and ice in the bargain.
Mud Terrain
Mud terrain tires are what many people imagine when thinking of stereotypical off-road tires on smaller vehicles.
Aggressive, knobby tread with widely spaced voids give these tires the best possible responsiveness and handling in muddy off road terrain.
The downside is they don’t do very well at all on pavement compared to other tires on this list, and they are notably quite noisy and a little unpredictable during emergency maneuvering on pavement.
High-Performance
These tires are designed to handle extreme speeds in regards to material capability and handling characteristics.
Within this category you have two subtypes, high-performance which is for speeds up to but not exceeding 168 mph, and ultra-high performance, which is for speeds up to but not exceeding 186 mph.
With relatively short life spans and rough riding characteristics these tires should only be employed for those vehicles that require them or drivers who know they need tires capable of handling such speeds.
Run-Flat
A special subcategory of tire typically employed on vehicles which do not carry a spare tire of any kind.
Designed with an especially stiff sidewall that will maintain the shape and profile of the tire even when air pressure is lost completely, tires of this type allow drivers to keep on rolling even at a reduced speed and only for a comparatively short distance to seek help.
Usually expensive and sometimes not capable of being repaired after being damaged, these might nonetheless be a good option for special circumstances.
Race Car
Exactly what it says on the label!
Race car tires are designed for race cars, ultra performance vehicles that are expected to perform feats of extreme cornering and operate continually at extremely high speeds.
Both generate massive stresses on tires, and accordingly these tires are designed for maximum, peak durability under these conditions, although they wear out quickly.
Race car tires are available in a further three subtypes, slicks, for normal use, rain, for racing use in wet conditions, and DOT, which are “street legal” race car tires.
Heavy Duty
A distinct category of tires, akin to light-medium duty tires but for much larger and heavier vehicles, commonly used on tractor cabs, semi trucks and their trailers.
Tires in this category are expected to carry a load of between 4,000 to 5,500 lbs on the drive wheels and are usually seen mounted in tandem on the vehicles that use them.
Off-Road
A subcategory of heavy duty tires commonly employed on massive construction vehicles, earthmovers, agricultural equipment and other big rig type machines that need to move over soft ground in order to do their jobs.
Typified by extremely wide and extremely deep voids between the treads, these are still sometimes employed on hard surfaces like tarmac.
This covers the spectrum of tires that most preppers could reasonably be expected to encounter or require for their purposes and owned vehicles, be they daily drivers or business-oriented fleet machines.
It is worth mentioning that there are many, many other kinds of tires besides the ones listed above, everything from tiny tires found on lawn equipment to specialized, solid tires for forklifts and similar machines.
Now that we have a basic grasp of tire categories, it is time to get down to the brass tacks and examine exactly what a tire code can tell us.
Sample Tire Code
Without any education on the subject, a typical code printed or embossed on the side of a tire might well look like a nonsensical cipher, but as you will soon discover they are actually quite easy to interpret.
Below is an example code that we will break down piece by piece into its constituent components:
P215/65R15 95H M+S
P – As we learned above, the p indicates a tire for a passenger car, a sedan, coupe or similar vehicle.
215 – This is the width of the tire in millimeters, one of the primary measurements discussed above.
65 – This is the aspect ratio of the sidewall height.
R – The letter R indicates a radial tire, though other Tire types are sometimes encountered for consumer vehicles. A ‘B’ indicates a bias belt tire where a ‘D’ indicates a diagonal belted tire. Note that no letter in this position of the code indicates a cross-ply tire.
15 – This portion of the code indicates the diameter of the wheel that the tire is designed to fit, in inches typically. Certain manufacturers use millimeters and millimeters is far more common elsewhere in the world than North America in which case it will be a three digit number.
95 – This is the load index number, and can be looked up on the ETRTO standards table to reveal the maximum load rating of the tire. A ‘95’ indicates that the tire is rated for 1,520 pounds.
H – This is the speed rating of the tire, and is similarly cross-referenced on a table to reveal the maximum speed that the tire is rated to handle. Note that these single or double digit indicators might be found elsewhere in the sequence, not always in this position.
M+S – Indicates an all-season tire type, as we learned above this M+S indicator is short for mud and snow.
That is it for the tire code shown above. Not too difficult, is it?
With just a little practice you will quickly learn to recognize what groups of characters indicate, and how they are commonly placed throughout tire codes so that you may quickly and surely interpret the specifics of any tire you come across so marked.
Tire Degradation
Tires are a surprisingly complex component, consisting of the best advances in automotive material Science combined with state-of-the-art manufacturing techniques to provide tires of unparalleled performance, longevity and durability.
We have come an awfully long way from the simple rubber tires of last century. The modern tire is a multi-component composite marvel, but they are not invincible.
Regular wear and tear from use, abuse from showboating maneuvers or hard cornering, burnouts, hard stops, and even exposure to weather in the form of moisture and UV radiation from the sun are enough to significantly reduce the service life of the tire.
This could potentially introduce dangerous weaknesses into its structural integrity, weaknesses that might translate into a blowout and subsequently a crash.
The point is that even tires mounted to a vehicle that is not being driven regularly must be maintained as usual in the form of regular rotation, inspection and protection from ambient weather conditions.
Tires that are left out exposed in nature will frequently degrade and quite literally rot right off of the wheel unless you intervene with preventative maintenance.
Be on the lookout for thin, hairline cracks in the surface of the tire as this indicates the beginnings of a dry rot.
Tire Failures
Tires are expected to put up with a lot in normal operation. Heat, stress, wear and tear, it all adds up and takes a toll and eventually from the accumulation of where in use or unfortunate running with a hazardous piece of debris or other mishap on the road tires can fail.
Invariably, this is when we can least afford to have our tires let it down, and all we can do in the aftermath is deal with it or pay someone else to deal with it for us.
Accordingly it is in your best interest to learn everything you can about common tire failure events so that you’ll know what to do in the event they do fail and whether or not it is worthwhile to attempt repairing the tire and returning it to service, or ditching it and simply putting on a replacement.
As you probably already guessed, the most common tire failure is a loss of air pressure, AKA a flat tire.
Tires go flat because they are incapable of holding the air that pressurizes them, giving them shape and the correct profile for normal operation.
Loss of pressure occurs from leaks, either fast or slow, or from a catastrophic loss of air pressure, usually called a blowout.
The root cause of either a leak or a blowout could be simple wear and tear or caused by a piece of debris that punctures the tire.
If you are lucky, you will simply come out to your vehicle in any given set of circumstances and find that one or more of the tires have gone flat, usually noticeable by the car sitting at an odd angle or failing that the distinctive rough ride and “wop wop” sound of a flat as soon as you begin to move.
If you are unlucky, however, a blowout can occur while you are at speed going down the road. This is the most serious and potentially the most life-threatening form of tire failure.
The tire either goes flat rapidly while underway or in the worst case scenario the tire disintegrates and comes apart leaving only the bare wheel in contact with the asphalt. In any instance, if this occurs at high speeds a loss of control is likely.
The vehicle will usually violently pitch to one side and an overcorrection can result in a severe skid or even spinning out. Should I blow out a curve for a large and heavy vehicle a wreck is almost certain.
Correct training and preparation can help a driver minimize the chances of a bad outcome should a blowout occur.
Whichever scenario you are facing, a blowout that strains you while underway on the highway or the unfortunate incident of a flat tire when you are ready to depart, you’ll need to get the wheel off the car to take care of the problem. We will cover how to do that in the next section.
Dealing with a Damaged or Destroyed Tire
Depending on the setting, your skill and the tools available you’ve got a couple options for dealing with a flat or destroyed tire.
A common flat tire is not the end of the world assuming that the tire is in overall good shape and has plenty of life left. These tires can usually be repaired in an ad hoc or permanent fashion to get your vehicle back on the road.
Most driver-level repairs are temporary or semi-permanent, designed to enable you to get the vehicle back underway at a modest speed and get the tire serviced.
Professional repair at a garage will repair and reinflate the tire restoring it to normal operation, like it never happened. However, some tire damage cannot be repaired at all, meaning the tire will need to be replaced.
This usually happens at the end of the tires service life from normal use or in the case of a particularly nasty puncture or a bad puncture that goes through the sidewall of the tire as opposed to the tread.
It should go without saying that tires that are destroyed, either blown open or completely shredded, cannot be mended.
In the case of a puncture that can be repaired there are a few options:
Plug – Plug repairs are among the most common employed by drivers as an interim fix for a puncture going through the tread area of the tire.
These kits are commonly sold at department stores and automotive supply stores and consist of a set of tools designed to help you remove a piece of debris that caused the puncture, clean up the hole and then insert a long, sticky epoxy plug to seal the tire.
Although these are intended to get a tire back in operation long enough to get to a garage, it is possible that a repair of this nature will last for quite a long time.
Patch – Using similar adhesive materials to the plug repair above, a patch is designed to adhere on the inner surface of a tire to cover a hole going through the tread area.
This requires dismounting the tire from the wheel, and that means it is usually going to be a non-starter for most drivers to perform, especially in an austere environment or on the side of the road.
Although not specifically intended for repairing punctures through sidewalls, difficult as they are to fix, in the case of a very small puncture a patch might be used on the outer surface of the sidewall.
Combination – For the ultimate in durability a combination repair might be instituted, utilizing both a plug and patch along with additional materials and adhesives to affect the strongest possible bond and restore the tire to service.
Performed correctly, a combination repair has the best likelihood of holding for a long period of time and at high speeds.
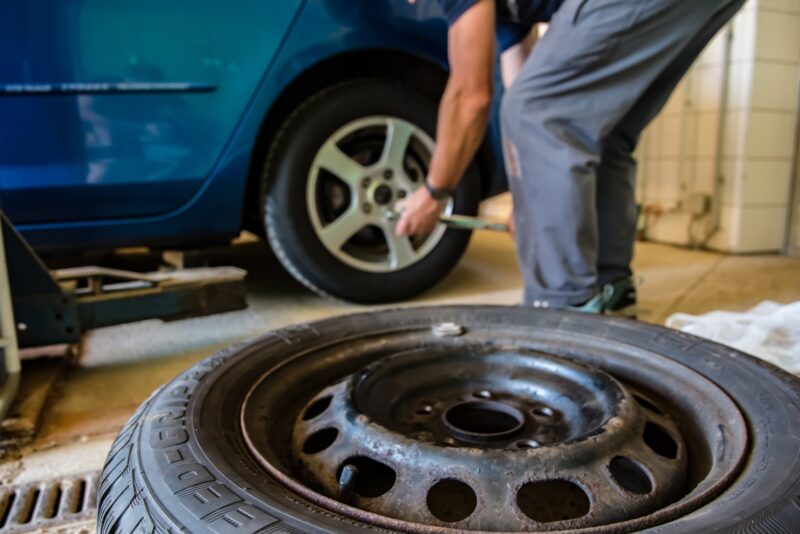
Switching Out a Damaged or Destroyed Tire
Whatever has happened, be it the discovery of a flat tire or the harrowing and hair-raising catastrophic blowout while you fly down the highway, your vehicle is effectively out of action until you switch out that bad tire.
This is most commonly done by jacking up the vehicle, removing the affected wheel and replacing it with a spare one if you are lucky enough to carry one aboard your vehicle. If you don’t, you’ll have to obtain one and then proceed.
Although intimidating to the uninitiated, changing out a flat tire is a simple process although it could be difficult in rough conditions or if the lug nuts holding the wheel onto the axle are stuck. Even this can be overcome with the inclusion of a few select tools.
This is a fundamental task that every single driver should learn and become fluent in because, as mentioned above, the flat tire is the most common equipment failure for any vehicle.
Below you will find a list of tools and after that procedures for swiftly, correctly and most importantly safely changing out a flat tire.
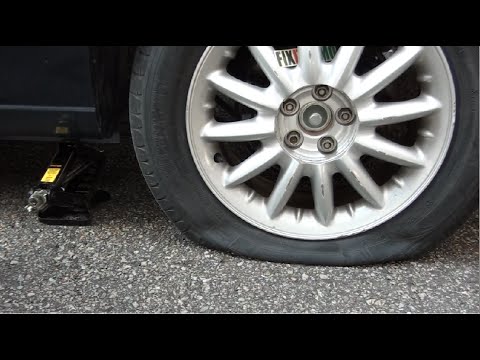
Jack – This should be a bit of standard issue equipment for your vehicle, whatever it might be.
You’ll use the jack at the indicated point according to your vehicle’s manual to lift up the car nearest the tire that has gone flat.
It is worth noting that common jacks included with your car’s equipment for the purpose are pretty weak on their own, and you should never, ever get underneath a car held up by a jack alone, or allow any part of your body to be underneath the car while changing out the tire.
Jack stands – A jack stand is a simple, mechanical apparatus designed to hold up a vehicle that has been lifted up with a jack and these provide a far better and more secure option for safely keeping the vehicle aloft when you are working on it for any purpose.
Jack stands are typically employed in a garage setting, and rarely carried along as part of a vehicle’s equipment complement except in special circumstances. Nonetheless, these are great to have around if you ever have to change a flat tire at your home.
Wrench – Also known as the lug nut wrench, because it is designed to fit the lug nuts holding the wheel onto the axle of your vehicle.
Again, this is something that should be issued with your car, truck or SUV but if you have a short, wimpy one you’ll need to upgrade it or add an extra tool to provide better leverage in case you are dealing with stubborn lug nuts.
Breaker Bar – The breaker bar is an extension for the lug nut wrench, and could be anything from a long-handled ratchet with an appropriate socket to a simple length of sturdy steel pipe that will provide far better leverage than a short handle lug nut wrench can muster on its own.
If you are dealing with a particularly tricky stuck lug nut a breaker bar might mean the difference between affecting a quick and efficient roadside replacement or having to call for a ride!
Gloves – Believe me when I say your hands are going to get dirty, greasy and potentially injured when changing out a tire.
Injuries range from busted knuckles thanks to a slipped wrench or a lug nut that suddenly releases to cuts and other injuries owing to roadside debris.
Get a good, lightweight set of mechanics gloves and keep them with your vehicle’s emergency kit.
Changing out a Flat Tire Step-by-Step
You have the tools and a flat tire that needs changing. The following steps will walk you through it.
As always, take the time to refer to your vehicle’s owner’s manual to ensure there are no other special procedures required to successfully and safely lift up the car and change a tire.
Step 1: Before you do anything else, the vehicle must be moved to a safe place well away from traffic, and if at all possible it should be flat, level and have hard ground capable of supporting the weight of the vehicle on the small footprint of your jack.
If you cannot get the vehicle far enough away from traffic to attempt a change, don’t risk it! Call for a tow instead.
Step 2: Time to get the car in the air. Retrieve your jack and the lever used to operate it if it is not permanently attached. Jack’s come in a variety of styles, so again consult your owner’s manual and place the jack in the correct orientation at the specified point for lifting.
Begin to lift the car in the air by operating the jack, taking care of every part of your body out from under the car while this is happening. Lift the car high enough only to get the tire just up off the ground.
Step 3: Loosen the lug nuts holding the wheel. Use your lug nut wrench to loosen the lug nuts, and be prepared to use plenty of force as they may be quite tight.
Employ your breaker bar if required. Loosen them only enough to where you can easily unscrew them by hand.
Once this is done, retrieve the spare tire and then finish removing the lug nuts before removing the wheel with the damaged tire.
Step 4: Time to mount the replacement tire. Before doing so, ensure that it is inflated to the correct pressure and otherwise in good shape.
Set the replacement tire on the bolts and snug it up before replacing all of the lug nuts until they are just finger tight.
Step 5: Begin at tightening the lug nuts as tight as you can using your lug nut wrench.
This should be done in an alternating pattern, either the one specified by your vehicle’s owner manual, or by tightening a nut and then moving to the next one opposite it on the hub in a clockwise manner.
Repeat this procedure until all lug nuts are as tight as you can make them.
Lug nuts should be tightened to a specified torque, but lacking a specialized torque wrench we just want to be sure that the lug nuts won’t loosen up when we get back on the road.
Step 6: Now operate the jack to lower the car all the way back down until you can easily remove the jack. Put away all your tools, double check your installation and then get back in your car to get back on the road.
Note: If using a compact tire or an emergency spare tire, AKA a “donut,” as mentioned above, keep in mind these tires are not rated for the same speeds as your usual tires.
Typically you’ll have to keep it under 50 miles an hour when rolling down the road on a donut, and preferably you’ll be going even slower than that.
Also keep in mind that such tires are not rated for extreme distances, and usually only have an operational lifespan of about 200 miles or perhaps less.
They are only designed to get the vehicle moving again so that you may safely drive it yourself to a garage for effective replacement of the damaged or destroyed tire.
And that is all there is to know about changing out a flat or destroyed tire.
With some practice, confidence and the right tools you can usually complete this ordeal in about 15 minutes or less even in rough conditions, assuming you have a decent place to park the car in order to work.
I recommend all preppers practice this procedure now so they won’t get it wrong in a live event.
Now You’re A Tire Pro
Tires are an essential and inseparable part of modern vehicles, in every category, and for those of us who rely on our vehicles every single day we probably don’t stop to give them much thought unless we have to pay for new tires or one of them fails leaving us stranded or delayed in our travels.
More than any other component on the vehicle the tires that get you down the road are most likely to fail and result in an accident or in a delay that you can ill-afford.
For that reason, it is essential that every driver but especially preppers cultivate and maintain a working understanding of tire specifics and the procedures for dealing with mishaps.

Like what you read?
Then you're gonna love my free PDF, 20 common survival items, 20 uncommon survival uses for each. That's 400 total uses for these dirt-cheap little items!
We will not spam you.
There is also a date code on tires. How about adding information so that people can know when their tires were made (and the approximate length of use for tires). Why buy a tire if it will not last you very long?