
When most people think of a safe room, they envision a completely enclosed, hardened vault-like room within an existing structure that is completely safe against any threat, against any form of attack or natural disaster.
While these popular conceptions certainly do qualify as safe rooms, and very good ones at that, this typical imagining is more a product of popular media like movies and TV shows.
In reality, a safe room can be almost any room in your home, or even your office that serves as a designated fallback point to withstand a natural disaster or intruders.
You don’t have to spend a fortune or re-engineer your house to benefit from a safe room, but it does have to meet certain criteria.
It has to be accessible in short order to all members of the house, it must be at least nominally hardened against forced entry and should ideally be stocked with supplies and other provisions to help you wait out any bad situation, at least in the short-term.
Most homes that people live in will have at least one room that can with a little ingenuity and perhaps a few choice upgrades be made into a serviceable safe room.
In today’s article I will share with you tips, procedures and other considerations that will help you make your safe room the best that it can be no matter your budget.
Every Castle Needs a Keep
Even a castle surrounded by high walls and battlements, virtually impregnable from the outside, should have within its confines a keep.
A castle keep is typically a tower, itself fortified, surrounded by another set of walls, used as a fallback point for the royal family and their defenders if the greater castle grounds and bailey was compromised by invaders.
While real castle keeps were rendered irrelevant by constantly improving artillery and other siege weapons, we can still use this concept today to our benefit in the form of a safe room.
If you are like me I will go ahead and assume that you have fortified your home externally and internally in order to make it a hard target for dedicated intruders and to also see it scratched off the list of potential targets posthaste by lesser criminals.
Security cameras, improved lighting, defensive landscaping, hardened doors, locks another entry hardware- the works. All of this adds up and helps keep evil people out of your home, or at the very least buys you plenty of time to muster a meaningful defense if they are hell-bent on getting in.
But you would be a fool if you did not count on those invaders getting in. It is a mistake to stop thinking about contingencies just because you have made the walls of your personal castle seemingly impregnable.
The question is, what do we do once they get inside? One valid answer is to, of course, fight them off and we should in order to protect what is ours, both our family and our holdings, but that entails a certain amount of risk.
As a corollary to the question of repelling boarders, you should ask yourself if anything you have is truly worth your own life, and the life of your family.
If you are like me, the answer will again probably be “no”. When confronted with armed and violent intruders, it is oftentimes best to disengage if at all feasible.
For most folks, this won’t be an option because they will not be able to simply run out of their house in good order with their family members in tow.
But if you do have the option to retreat further inward on defense, in the form of a safe room, you’ll be in a much better position to both protect and to ensure a positive outcome with no one injured or killed.
Safe Rooms on Defense
Inside your safe room, you will have every family member accounted for, an easily defensible, hardened entrance that should be proof against most attempts to break in, and all the supplies and equipment you might need to deal with injuries or call for help.
Safe rooms can take the form of a simple room with a sturdy door and barricade and some pre-placed supplies, or a purpose-fabricated and installed miniature bunker proof against any breaching attempt and replete with air filtration system, communications gear, weapons and more.
That being said most will fall somewhere in the middle for most folks, so we will discuss the criteria for designating, fortifying and equipping a safe room in the sections below.
Some of these items will be achievable for you, others will not, and perhaps for reasons besides cost. That’s alright. What is important is that you fix up your own safe room (so you have a safe room) according to what you can achieve.
Some of the items for consideration when designating and equipping a safe room:
- Location and Accessibility
- Hardening – Against Gunfire and Entry
- Supplies and provisions
- Defensive Weapons and Other Equipment
- Communications
- Escape Route
We will talk about each of these in turn just below.
Location and Accessibility
The location of the safe room inside the house or structure will be of paramount importance.
For a safe room to be effective against intruders you must be able to reach it along with all of the other people in the house that you care about and then secure it against further entry.
If accessing your safe room in an emergency will take you through hallways or rooms that are already likely to be occupied by intruders, you might as well not have it.
For many people, locating a safe room immediately off of the master bedroom makes the most sense, and plenty of people will choose to make the master bedroom itself the safe room.
For families, this is usually a smart move as it is a fairly easy thing to train all the members of the family in the home to head for the master bedroom in times of trouble.
Many home layouts also feature the master bedroom co-located near the other bedrooms, meaning little time will be wasted in heading for the safe room.
If you happen to live alone or it is just you and a partner inside the home, all you will need to do to secure your safe room against entry is close, lock and secure the door.
This is the picture of simplicity in an otherwise high-stress situation, and unless there was some other reason why that won’t work should be your first option.
But assuming that the “master bedroom as safe room”, or safe room located off the master bedroom concept will not work, it doesn’t mean you should abandon it entirely. It just means a safe room may not be a viable response for the entire family in case of home invasion.
It might still be an excellent option in response to civil unrest, disaster and other crisis situations- you will just need a little more time to access it.
That is something that is entirely achievable so long as you have a little more notice than “team of robbers break in at 3 a.m.”
In a multi-level home, or a home with a basement, think long and hard about locating your safe room underground or above the ground floor.
One key element to a good safe room is a secure, or at least hidden, emergency escape exit that will allow you to get out of the safe room and preferably out of the house in case of really dire straits like fire or a prolonged siege. A safe room located above or below ground can complicate that.
Below is your checklist for locating your safe room and making it accessible:
- Located in or very near master bedroom, if possible?
- Readily reachable by all members of household?
- Located on first floor if possible.
- Does location allow for emergency exit?
Hardening: Gunfire and Entry
For a safe room to truly be considered a safe room it must be impregnable to the people who want to harm you, or at the very least delay them considerably enough that they give up for fear of the cavalry arriving in the form of reinforcements you have summoned or the police arriving.
This means that the entryway to your safe room must be hardened against attempts to pry or kick it open and also that the walls and potentially even the floor and ceiling should be constructed of material or armored in such a way that they can resist gunfire.
Top of the line, purpose-built safe rooms will also be resistant to explosives and other breaching methods.
This is one part of safe room siting and construction that will require a considerable amount of money for improvement or an awful lot of laborious DIY, at least if you want to harden the room beyond the most elementary upgrades.
Opening up or rebuilding walls with the intention of adding purpose-made armor or just laying in bullet-resistant material takes time and a not inconsiderable investment in finances. The larger the room, the better the armor and the more advanced the hardware is the higher the price tag will climb.
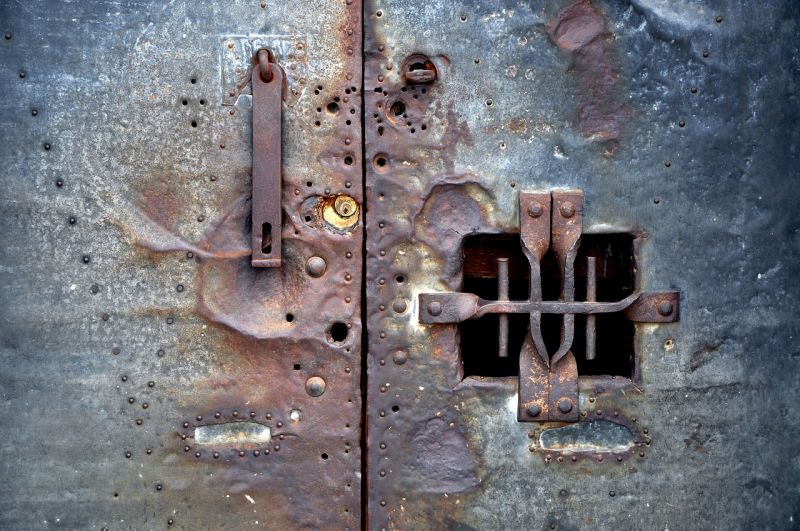
At the most basic level, your safe room should have a solid, heavily-built and high-quality door installed with equally high-quality hardware within a heavy-duty frame that will resist kicking or prying.
No matter how good the door is and how good the hardware that it hangs on, it should be backed up by some type of reinforcement, anything from a horizontal bar that goes across the frame or an angled bar that slots into a receptacle on the floor (commonly called a burglar bar), to a full frame anti-kick device like the Door Devil.
On the opposite end of the price and complexity spectrum you can install something akin to a bank’s vault door with multiple hardened steel pins that slot into a specially made frame for the ultimate in strength and breach resistance.
Of course, a door is only as good as the wall surrounding it, as some witless homeowners have discovered when burglars literally tunnel around their top-of-the-line security door to gain entry to a room in the house.
Wall reinforcement is a bit more complex than merely purchasing a new door and adapting the opening accordingly. The walls must be able to resist mechanical breaching as well as gunfire.
Common construction materials that are resistant to gunfire include concrete, brick and other masonry and certain thicknesses of sheet steel. All of the above are relatively affordable, but can be highly complicated to install in an existing house and are best put to use during the construction phase.
All of them also have the disadvantage of being very heavy, and structural load limits around the safe room will be a legitimate factor, especially when the safe room is on a second floor or near the center of the ground floor if not on a slab.
Purpose made armor is another option, and can take the form of man-made fabrics like Kevlar or Dyneema, armor-grade steels or other alloys, and potentially even ceramics.
Any of these may garner weight savings over conventional construction materials that are merely bullet-resistant, as well as providing you enhanced ballistic protection, but the disadvantage is that they will be extraordinarily expensive to install completely around a room of any size.
Regarding ballistic protection it is crucial that you keep in mind not all armor is up to the task of stopping repeated hits from rifle fire!
With enough time and repeated hits or with powerful enough weapons your safe room’s armor can fail, and though it is likely to degrade projectiles that defeat it it may no longer stop them.
Regardless of the cost and aggravation involved you must not skip on this step if you can afford it, as mechanical and ballistic protection provided by the door, walls, floor and ceiling of your safe room is very literally integral to the concept of the safe room itself.
Your safe room hardening checklist:
- Door, door hardware and frame must be of high strength and grade.
- Wall reinforcement is a must to prevent intruders from bypassing door.
- Ceiling and food may optionally be hardened to protect against prolonged siege or determined intruders.
- Armor or enhancement with bullet-resistant materials is a must for protection against gunfire.
- You must carefully assess load-bearing potential of your host structure before installing any of these upgrades!
Supplies and Provisions
You wouldn’t jump into a life raft without any provisions if you had the choice, and so you should not retreat to your safe room without having all supplies and provisions you might need for an extended stay already inside.
This does not mean the safe room must be equipped and appointed the same as a luxury hotel, but you should always include at a minimum basic life support supplies, food and water.
Considering why you might need your safe room in the first place, and for those of you in the back I am talking about human violence particularly, medical supplies are a must.
I’m not talking about the dinky first aid kit you keep in the medicine cabinet, but instead a properly outfitted trauma kit that can take care of everything from penetrating trauma to blunt force impact and everything in between.
Of course, it will not hurt to have items that are capable of taking care of lesser boo-boos, but those are not what we are mainly concerned with when we have to retreat to our safe room.
One item you should have inside your safe room in abundance is water; in small bottles or large jugs, makes no difference. You’ll certainly need this for hydration, and also for potentially cleaning wounds.
Considering you might be buttoned up for some time, basic food supplies in the form of long-lasting, high-calorie and ready-to-eat meal replacements or snacks are a good idea also.
Take the time to consider what you might need after barreling into your safe room in a frenzied rush. What is something that will be left outside that you would really like to have while inside?
How about prescription medication or prescription eyewear? Perhaps a set of clothes that is more suitable for the situation than your pajamas or your underwear? How about some footwear to go with them?
Nothing is necessarily off the table: take the time to think the situation through and emplace ahead of time all of the supplies and provisions you will need under the circumstances that saw you scampering to your safe room in the first place.
Below is a checklist for supplies and provisions to include in your safe room:
- Comprehensive medical kit including trauma supplies.
- Water, jugs or bottles.
- Food, high calorie, stable meal replacements.
- Any and all prescription medications and eyewear.
- Clothing.
- Footwear.
Defensive Weapons and Other Equipment
Again, count on the fact that you will likely have cause to retreat to your safe room under duress from hostile intruders and you will see the wisdom in pre-emplacing defensive weapons inside.
This is not to say that you will need them at the instant if you have constructed your safe room appropriately, but you might.
Eventually, you will have to come out, and if the situation is not defused by then you might have to do so with guns blazing. Alternately, emerging from your safe room into a world that is half upside-down will probably make you glad to be armed.
At the most basic, you should keep some spare magazines or other ammo sources for your primary, bedside defensive guns or concealed carry guns within your safe room. This will provide you with ready replenishment in the event you need to fight prior to entering.
On the opposite end of the spectrum, the overall security of a safe room means it is an ideal location to emplace multiple, redundant guns and plenty of ammo in anticipation of needing them during a SHTF scenario.
But let’s assume you cannot have or choose not to own guns for whatever reason. That does not mean you shouldn’t include defensive weapons in your safe room’s complement at all.
A large “riot” can of pepper spray is an excellent choice, as is a sturdy fighting knife or some other melee weapon.
Pepper spray at least gives you some standoff capability but knives will only be good when at bad breath-distance from your assailants.
No matter what weapon you choose to arm yourself with or prefer for self-defense, make sure at least one is waiting for you inside the safe room.
Besides weapons, other tools of self-defense and self-preservation will be paramount if you must call on the refuge of your safe room. Flashlights and lanterns with batteries aplenty should be kept on hand, checked and rotated regularly.
A fire extinguisher or two might be the only thing that can stop you from getting smoked out of your safe room or seeing your house burn down. For longer stays, a self-contained toilet or at least a bucket with a lid along with some odor-control media is a great thing to have.
Lastly, spartan creature comforts in a safe room can help when the time comes to take rest. Some blankets, pillows and even a folding cot might help make the difference.
For the highest-end safe rooms, an independent air-handling and filtration system can help keep you comfortable and safe from all kinds of airborne hazards and contaminants, though such a system is naturally expensive, and requires considerable upgrades to the room itself to be viable along with regular maintenance even when not in use.
For the most well-off or dedicated DIY preppers, such a system can truly see your safe room serve as a SHTF “lifeboat” no matter what kind of disaster is occurring.
Consider the following equipment checklist when outfitting your safe room:
- Firearms and/or extra ammunition.
- Pepper spray canister, large.
- Knife or other contact weapon.
- Flashlights and extra batteries or chargers.
- Small, self-contained toilet or bucket with absorbent media.
- Blankets and pillows.
- Folding cot.
- Air-handling and filtration system.
Communications
No matter what kind of safe room you are building and no matter where it is located, you must have some form of reliable communication to the outside world within.
The ability to call for the cavalry and wait for reinforcements or relief to arrive is essential. This can take many forms depending on what methods of communication will be most reliable in your area and from within your safe room.
For most preppers who are equipping a modest safe room likely all you will need is your cell phone assuming you have signal from within the room itself. This is dependent on having both power for the cell phone and the phone itself on you when you slam and lock the safe room door behind you.
For this reason, it is not a bad idea to keep a dedicated cell phone within the safe room and charged at all times.
If you have poor or dodgy signal in the safe room, consider running a cell phone signal amplifier and antenna arrangement within that can help “pipe” the signal clear of the safe room’s heavy and interfering walls.
A landline telephone is another viable option, but one that is vulnerable to attack by bad guys who might cleverly decide to cut the line where it ties into the house.
Some safe room owners for this reason setup a dedicated, shielded phone line just for their safe room that will ensure they can make use of the telephone even when the primary line is severed. So long as the network is intact and powered, of course…
More advanced self-contained communications options that are excellent safe room candidates include a family-service, or ham radio set with its own power source.
These devices will be proof against anything that might cripple the cellular or landline phone network or its power supply, but will take training and experience to use to best effect, and summoning help is no longer as simple as dialing 911.
It is a good idea to make prior radio contact with known persons who might help you summon aid in such a scenario.
Even more advanced communications options include satellite phones which are completely self-contained and further insured against terrestrial mayhem so long as the infrastructure servicing their satellites are still operational.
The worst “dirtside” disasters will not often hamper these ingenious marvels in the slightest.
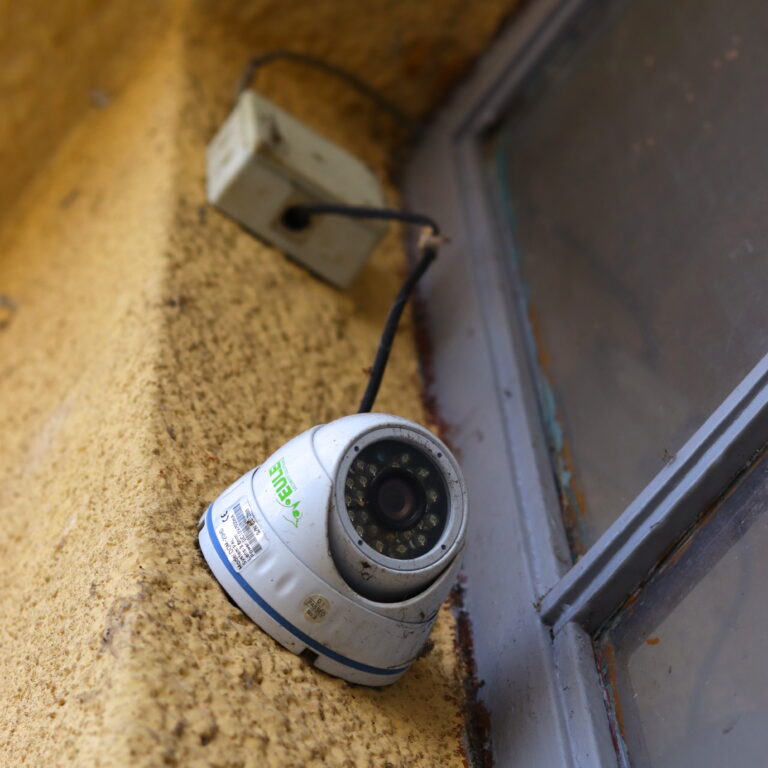
One commonly overlooked element of communications for safe rooms is a simple intercom system that can let you talk to people outside the door, throughout the house and even at the entrance to your property.
Also, just as important is the ability to listen to these external mics even when you are not actively transmitting; this is another vital source of intelligence that you should invest in alongside cameras.
The ability to communicate and coordinate with people outside your safe room while you are inside is crucial. Consider any or all of the following options for your safe room:
- Cell Phone with dedicated charger and/or power bank.
- Dedicated landline telephone, if available in area.
- GMRS/Ham radio set.
- Satellite phone.
- Whole house intercom system.
- Interior/exterior surveillance cameras.
Escape Route
One fatal flaw that some misfortunate preppers bake-in to their escape room is a lack of secondary escape route. If your safe room is one way in and one way out, it might become your tomb when the situation becomes unsalvageable and unsurvivable.
Fire is one such scenario that will spell doom for all but the most cleverly constructed and advanced safe rooms since even ones that can survive the extraordinary heat of a house fire will usually asphyxiate their occupants.
It is also not out of the question that bad guys in the wrong state of mind and not fearing any retaliation or friendly reinforcements from your side might decide to crack your shell and drag you out, doing so with power tools, explosives or massed gunfire. This is another potentially grisly end you can and should avoid!
And avoid it you should, if you have a secondary exit from your escape room. Your secondary exit can deposit you somewhere else in the house or even outside the house depending on how it is set up.
The style and furnishment of such is up to you and once more dependent on your budget and inventiveness.
I personally know a prepper who has their escape route lead from the safe room on one end of the house via a smallish, crawlspace-sized tunnel to a hidden door beneath their kitchen island, and another whose basement safe room has a full-size tunnel that leads to a hidden, sealed hatch in the woodline over 50 yards from their home.
No matter what kind of escape route you are installing it must be completely hidden both from within and without or secured in the same manner as the primary safe room door, or else you risk letting the clever and the nosy into your unprotected backside.
Considering how logistically burdensome a proper escape tunnel can be to install in existing structures, these are usually built during the construction phase of a home or other building.
You should think long and hard before omitting an escape route from your safe room. Consider the following:
- Escape route leads elsewhere in home or outside home?
- Escape route must be completely hidden at exit point and/or secured similarly to primary door.
- Installing safe room and escape route during construction affords many more options.
Conclusion
Safe rooms are not just the stuff of paranoid characters in movies and on T.V., and serve much the same role for preppers today that a castle’s keep did for the occupying royal family in eras gone by.
A safe room need not be a technological and expensive marvel to work for you but it must have certain essential features in order to be worthy of the name and do its job, features we have laid out in the article above.
Using this article as a guide you should be able to intelligently and correctly install and fortify your very own safe room!

Like what you read?
Then you're gonna love my free PDF, 20 common survival items, 20 uncommon survival uses for each. That's 400 total uses for these dirt-cheap little items!
We will not spam you.
I’ve thought about putting a roll-down shutter or security gate over the inside of my bedroom door. They are expensive new but you can sometimes find them used.