
Though the thought of facing the dentist’s chair sets most people’s skin to crawling, it is nonetheless my responsibility to remind you as a prepper that you will not have access to a dentist, most likely, when facing a medical emergency in the middle of an SHTF situation.
It has often been said regarding self-sufficiency that you must become your own first responder. As awful as it is to contemplate, you must also become your own dentist when there is no one left to call when facing a dental emergency.
All kinds of bad things can happen to your teeth in the aftermath of a disaster, and physical trauma is not the least of them. Probably the most common type of dental emergency will be a rotten tooth or teeth incurred from a lack of proper dental care and maintenance.
Most cavities start out as a nuisance, or even unnoticeable. But over time, gradually, they will become severely painful, affect other teeth next to them and even lead to the onset of gum disease.
The pain will be absolutely dreadful, and this is a proper medical emergency; it is only a short hop, skip and jump for an infection to make its way from your mouth into your bloodstream and even all the way to your brain. That will pretty much be the end of things if it happens to you.
I will not lie to you: extracting your own or someone else’s rotten tooth is going to be one of the most excruciating and grueling experiences of your entire life, but it is possible.
People have been doing it for a very long time, and though it is never easy and is always fraught with peril, this is still a skill you should have at least an academic understanding of in case that fateful day ever comes.
In this article we will provide you with some advice and procedures for extracting a tooth on your own.
Disclaimer
The contents of this article is not medical advice, this is for information and entertainment purposes only. Neither the author nor ModernSurvivalOnlinec.com or the company behind it shall be held liable for any injuries or side effects as a result of applying the information herein.
Effects of a Rotten Tooth
The effects of pronounced tooth decay are many and varied. On the basic side of the spectrum you will experience pronounced pain, the kind of pain that can impair both mind and body.
Sleeping is often one of the first casualties as the throbbing, aching pain located in the head will make getting meaningful arrest difficult. Even breathing becomes painful when a badly rotten tooth has gone beyond the point of no return.
Eating, as you might expect, will be extremely challenging to nearly impossible depending on where the tooth is located, and you’ll have to scratch off a huge variety of foods from your menu. Any food that is hard or crunchy, even something like carrots or apples, will have to go.
Your increased dependency upon foods of a certain texture and softness will in essence eliminate certain foods from your food supply, or force you to process other foods into an edible mush. Not ideal, and double that for a survival situation.
Lastly there are systemic health effects to worry about. Infections of the mouth will be extremely common, and in some cases these can progress into the gums threatening more teeth or even the jaw.
Swallowing saliva that is laden with bacteria emanating from the site of the rotten tooth can eventually introduce infection into the bloodstream, a condition known as sepsis. This can lead to septic shock and death.
Gruesomely, infections that enter the body from abscesses in the mouth have a better than normal chance of making their way to the brain. Meningitis is far from unheard of as a consequence from a rotten tooth.
Perhaps most insidiously long-term health effects result from poor oral health, including leaving badly rotten teeth in place. Heart disease, stroke risk, and even impaired mental function are all decidedly linked to severe tooth decay.
If you are in the middle of a long-term survival situation, that means a dentist is unreachable or that there will flat-out not be any proper dentistry for the foreseeable future, you will have little choice: you must extract the tooth yourself.
Gather the Right Tools
Forget about what you have seen in various forms of media; if you are even considering attempting emergency extraction of a rotten tooth on your own, having the correct tools is a must. Gather the following, or on go on and add them to your stash now:
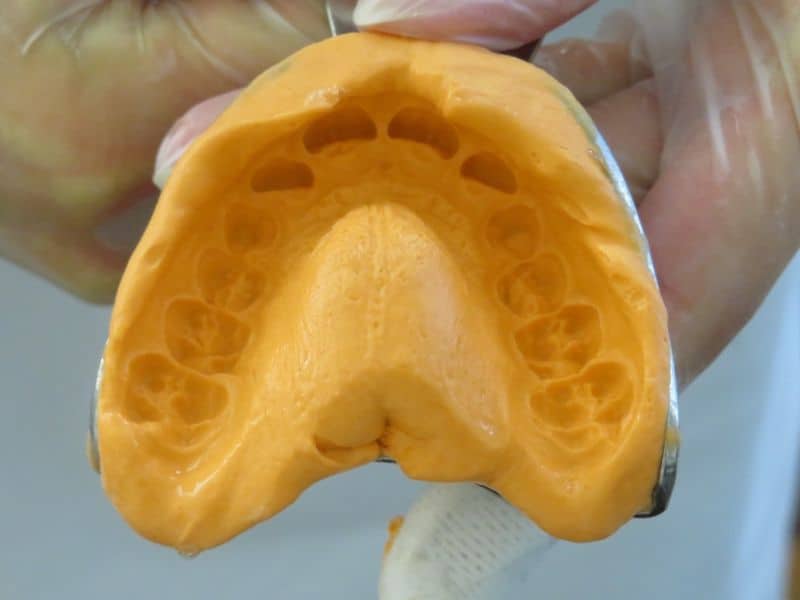
- Periosteal – These are a specialty dental excavation tool, sort of a cross between a probe and a miniature pry bar. These are used to help lift the tooth from its socket, but more importantly they help to separate the ligaments that keep it rooted firmly in place. Lacking these you can make do with thin sculpting tools commonly used by artists.
- Extraction Forceps – This is the money-maker tool. Extraction forceps are designed to firmly grasp a tooth and allow you the leverage and purchase to pull it free, but do so without crushing the tooth or damaging one that is already damaged. Not easy to find in a pinch, so get some of these now. Don’t use standard pliers unless you have nothing else; the risk of crushing the tooth and pulping the gums beneath is just too high.
- Tweezers, forceps or small hemostat – You’ll need these for delicate removal of smaller pieces of the tooth that are left behind, or break off during the main procedure.
- Dental Mirror – Useful for getting a better look at an awkwardly placed tooth.
- Pain Killer/Anesthetic – You don’t need me to tell you this is going to be excruciatingly painful in a life-altering way. Something, anything to dull the pain for you or your unfortunate patient is going to make a big difference. If you are using any injected anesthetic, make sure you know what you are doing before attempting.
- Gauze – You are going to need it. Bleeding will be copious after an operation such as this and you’ll want something both to help mop up the blood from the extraction site and promote clotting.
- Disposable Gloves – Infection through the mouth is always a risk, and the chances are it will never be higher than right now. Despite the grisly nature of this procedure, don’t skip over proper sanitation; whoever is doing the pulling should cover their nasty hands with disposable gloves to help cut down on the chance of infection.
- Reclining Chair or Bench – You will not be able to procure a proper dentist chair before the fateful day arrives, so make do with any kind of reclining chair or bench you can find that is stable. Positioning the patient at the correct angle will help things go more smoothly.
Extracting the Tooth: Procedures
Probably the most agonizing and hair-raising experience that you or anyone else could go through concerning an oral emergency is the extraction of a damaged, diseased or rotted tooth.
This will require courage, endurance, the proper tools and the right know-how and equal measure but there is no way around it: There Will Be blood and unless you are fortunate enough to have good anesthetics plenty of pain.
Pulling a tooth should never be done lightly because the likelihood of complications in the aftermath is high, but neither should you wait when a tooth is beyond saving. A badly rotted tooth can easily lead to severe infection, including sepsis, a severe infection of the blood which can be fatal.
This is it. You must do what must be done. Consult the procedures below, rehearse a few times if you must, and then get to work.
1. Sterilize Tools
Again, infection is going to be one of the single biggest risk factors in his operation and you must do everything possible to avoid it. Sterilizing the tools you will use is a must.
This can be accomplished through a variety of methods, including soaking the tools in barbicide or a strong bleach solution after thoroughly cleaning them. You can also use boiling water.
Take great care if all you have is open flame or another intense source of heat so that your tools do not lose their temper and fail when you need the most. Make sure you let the tools cool down before using them!
2. Position Patient, Disinfect and Rinse Mouth
Get your patient in position and as comfortable as possible.
If you are working on your own tooth, you’ll have to assume a position as best you can that allows you to maneuver the tools and generate the needed leverage.
Depending on which tooth requires extraction, position the patient accordingly to afford you the best view and the best leverage because you are going to need it. For an upper tooth extraction, the patient should be reclining at approximately a 60° angle and around elbow height for the operator if they are standing.
Now is the time to thoroughly clean, rinse and disinfect the patient’s mouth. Ideally they will have thoroughly brushed and flossed ahead of time, but if not have them do that before you get them back in position. Use anything you have available to clean the mouth and especially the site around the targeted tooth.
Lacking proper oral disinfectant or mouthwash, you can use strong alcohol to kill germs though this will entail some pain and discomfort.
3. Glove Up, Mask Up
Once you have the patient in position, take the time to thoroughly wash your hands up to the elbows, don your gloves, and put on some kind of mask to cover your mouth.
You don’t want to be breathing into the site of an open wound in someone else’s mouth. It is at this point you should also take the time to protect the worn clothing of yourself and your patient, if appropriate: There will be blood.
4. Apply Anesthetic or Administer Painkillers
Whew, this is going to get bad. Administer anesthetic or painkillers to your patient, or give them to yourself. You must take care if you are working on your own tooth that you do not impair your motor skills, coordination or awareness.
Whatever the case, give this plenty of time to take effect and do some ginger testing to see if pain and sensitivity at the site of the tooth has been reduced enough to improve the patient’s comfort.
Local anesthetic in the form of xylocaine is what is often used in dentists’ offices but other options abound. A tiny dental syringe will make direct injection of numbing agents easier.
Lacking these specialized drugs, a strong dose of oral painkillers may at least take the edge off, though you should not use aspirin or any other blood thinning drug since this will reduce the speed and efficacy of clotting, a crucial factor for healing in the aftermath.
Once you have applied any anesthetic on hand, if you have it, give it time to take effect then steel yourself and get to work. Lacking absolutely anything else you can take a big swig of strong liquor for courage, and a mild numbing effect. With this accomplished, it is time to go to work.
5. Detach Ligaments from Tooth
Using the periosteals, begin to excavate the targeted tooth at and beneath the gum line.
A periosteal elevator is a small, thin chisel-shaped blade that is used to reach down between the tooth and the gum line and loosen the ligaments holding the tooth into its socket. It can also be used to fish fragments of broken teeth out of a socket in case of a badly damaged tooth or the extraction procedure goes sideways.
You want to work around the perimeter of the tooth sort of like you’re trying to pop a reluctant tire off of a rim. This will start to detach the ligaments anchoring the tooth in place and allow you to pull it free more easily in The Next Step.
Be advised, there will be plenty of bleeding from this step alone, so be ready with the gauze pads or cotton balls, and consider placing some in the cheek of the patient in order to soak up blood more readily.
6. Extraction
Once you have gone completely around the tooth with the elevator tool to loosen it, grasp the tooth as low as possible with the extraction forceps ensuring you have a good grip on it. Take care that you don’t use any more pressure than necessary or else you will increase the chances that you crush the tooth.
Using the extraction forceps grip the targeted tooth as low as possible, taking care not to crush or break off any pieces if possible. If the angle is correct you might be able to use a back-and-forth rocking motion to loosen the tooth in the socket, easing extraction.
When rocking or tilting the tooth for extraction, angle it away from the tongue, that is toward the cheek or toward the lips. This ensures there is plenty of clearance between the tooth and tool and other teeth that are not being removed. Once again, an exception is made for the rearmost molars which may have to be angled inward for removal.
Use the greatest possible care and the minimum amount of force needed to avoid damaging neighboring teeth or teeth elsewhere in the mouth. You don’t want to yank on the extraction pliers like you’re trying to start a lawn mower because if you slip or if your exit vector is off you can do more harm than good.
With lots of pain and plenty of blood the tooth will come out. If working on someone else, resist entirely the temptation to shout “You can’t handle the tooth!”
7. Inspect Tooth
Once the tooth pops out take the time to examine it, particularly the root. See if you can ascertain whether or not any parts of the root are missing or have otherwise broken off. Most teeth have only one root, but larger ones like molars might have two.
It is far from unlikely that the tooth could break or be crushed entirely during removal, especially when starting with a badly damaged tooth.
If this occurs, you’ll need to remove it piece by piece, using forceps and tweezers along with the periosteal and probes to ensure that every part is removed. Leaving a broken or rotting tooth in the socket virtually guarantees a severe infection.
8. Extract Broken Parts
If you ascertain or suspect that any parts of the tooth have been left behind, you’ll have to head back in with your smaller tweezers, periosteals and forceps in an attempt to remove them from below the gum line. Make sure you get them all out, as they can lead to infection and other problems later.
9. Staunch Bleeding
The site of the removed tooth will be bleeding heavily by now, so you’ll need to staunch that blood flow.
Once you are sure the tooth and all of its fragments are removed take a large, folded gauze pad that fits into the socket and have the patient gently bite down on it to hold it in place and apply pressure. With a little luck, clotting will begin soon. If the gauze pad becomes soaked carefully remove it so that you do not pull out a forming clot.
This will be fairly agonizing if the anesthetic has begun to wear off, but is necessary to stop the blood flow.
In cases where considerable soft tissue damage was inflicted sutures might be necessary, adding even more pain to what has already been a painful affair.
That’s a whole other can of worms. Or you can apply a dab of super glue to help staunch the blood flow. This must be done with extraordinary care and precision, obviously, lest you glue somebody’s mouth shut but super glue also has the advantage of providing some pain relief.
10. Finished
The tooth is gone, the bleeding is controlled and your patient is alive, for now. Follow on care is critical. Assuming a clot has formed in the socket all attempts must be made to keep this clot in place.
Advise the patient to avoid smoking, spitting, chewing and using a straw in any fashion. A diet of liquids and soft, easy to swallow foods will help reduce discomfort and promote healing.
Congratulations, you have successfully removed a damaged or otherwise threatening tooth when no dentist was available.
Your patient and probably you may very well be mentally scarred for life, but at least you aren’t going to die from a preventable infection.
Aftercare
Pain relief is obviously going to be high up on the list of needs after emergency removal of a troublesome tooth. Any painkiller is better than nothing, including such common standbys as acetaminophen and ibuprofen.
One that you should avoid, however, is aspirin since it helps to reduce clotting which is definitely something you don’t want in the aftermath of a procedure like this.
Also keep in mind that once the extraction procedure is finished, your patient or yourself is not quite out of the woods yet.
A gaping wound in your mouth where you used to have a tooth it’s still going to be ripe for infection, so if you have any antibiotics in your medical stash, now is definitely the time to use them.
If you lack such antibiotics or have not taken the time to stock them ahead of time you should remedy that deficiency.
Caring for the site of the operation is mostly a matter of changing out the gauze pads for comfort, keeping the mouth rinsed and clean (a warm salt water solution is ideal) and taking care to avoid eating or drinking anything that will cause further injury or discomfort.
Definitely avoid the use of straws, as the suction induced might remove a forming blood clot starting the healing process all over again.
If the patient is a smoker, they should stop for the duration of the healing process. Bruising and swelling are more than likely going to occur, and can be managed externally along the jaw through the use of ice packs or warm compresses.
That is pretty much all you can do, and hope that things don’t get worse!
Conclusion
Do-it-yourself extraction of a broken or rotted tooth in a prolonged survival situation is going to be one of the most harrowing and grueling things of your entire life, but it can and must be done.
Take some solace from the fact that humankind has been dealing with this very problem for a long, long time. With the right tools and some correct preparation your chances of success will be greatly improved, and potential damaged unmitigated.
Make sure you use the utmost caution to prevent infection and then follow after care regimens strictly so that healing will be uncomplicated and trouble-free. I wish you luck, and hope you never have to make use of what you learned in this article!
updated 09/13/2021
Like what you read?
Then you're gonna love my free PDF, 20 common survival items, 20 uncommon survival uses for each. That's 400 total uses for these dirt-cheap little items!
We will not spam you.
Excellent article and I hope I never have to perform any extractions on me or anyone else. On the fun scale, that would be right up there with a self-appendectomy but you never know what cards you’ll be dealt when the SHTF.
I’ve heard that garlic has antibacterial/viral properties, maybe take a piece of garlic and bruise it slightly and lay it on top of the gauze.
Also, I’ve heard cloves will help stop a tooth ache.