
Staying clean is not just a good idea in kind times in order to remain socially acceptable and claim your seat at the lunch table. Cleanliness is crucial to maintain good health even if the sky is falling or society is crumbling.
You must not underestimate just how important it is to stay clean, even if you have seemingly more pressing concerns. Throughout the world, inadequate sanitation, or a complete lack thereof is a major source of death and disease. You are not exempt just because you live in the West.
No matter how bad things look, you must keep personal hygiene as part of your daily or weekly procedures. When hygiene and sanitation starts to slack off, that’s when things get bad.
Debilitating or even fatal diseases can result from a lack of care and cleanliness. Things will be hard enough after an SHTF event. You don’t need to make things even harder on yourself because you refuse to bathe yourself.
In this complete guide to SHTF sanitation, I’ll provide you with tips and procedures to maintain your personal hygiene during an SHTF event, as well as how to keep your environment clean and hopefully disease-free when the public utilities and waste disposal services stop working.
Cleanliness is Critical for Prolonged Survival
If you listen to the wrong people in survival in preparation circles, it is easy to think that staying clean is just a social nicety. That’s far from the truth. Good personal hygiene is mandatory for continued health no matter what situation you’re in.
Buck this trend, and you’ll quickly find yourself beset by debilitating illnesses and maladies of all sorts. Some of them are annoying. Some of them are serious showstoppers and may even be fatal.
Do not be swayed by the assertions of the wild “Mountain Man” types who bash proper cleanliness and self-care routines as superfluous or unneeded in light of bigger picture problems.
They may offer you advice like that with the best of intentions, but would actually be selling you down the river since a lack of cleanliness actually makes you more vulnerable to the diseases alluded to above.
And not for nothing, those guys fail to take into account the entirety of the survival calculus. Spoiler warning: it involves other people!
Most people will never survive alone for long. People are social. That means people survive, and work best, in groups.
While Butch up there may be completely content to run around the woods by him wearing nothing but a coyote pelt and his own fragrant man-stench if you try to do the same in close confines with your family or group members nearby you can rest assured that nerves will become raw and tempers will flare in very short order.
It’s funny how we go nose-blind to our own stink, but never someone else’s.
The good news is that austere environment personal hygiene protocols are pretty simple to follow, easy to implement and fast. No, you are not going to enjoy your typical daily bathroom experience, but you also won’t go around as a grubby, festering walking pile of filth.
In the next sections, I’ll break down what personal cleanliness looks like in a survival situation, what sanitation considerations you should keep in mind, and how you should implement your personal cleanliness and sanitation plan based on your unique situation.
Why Should I Care When I Have Bigger Problems?
Even in light of the unassailable logic that keeping clean is definitely in the best interest of health and ongoing survival no matter what kind of situation you’re in, some people still don’t want to get on the bus.
Whether it’s from a misguided sense of machismo, or a misinformed opinion that spending time on cleanliness is actually time wasted they’re still wrong.
A lack of care can result in conditions of the skin or mouth that can easily lead to infection. As you probably already know in a post-SHTF environment you cannot simply dial up a doctor or run into a clinic or visit the emergency room.
If you get a roaring infection started then, that may mean you are heading for a bad end. Diseases that are considered nuisances or afterthoughts here in the West only due to our extreme medical prowess may very well become life threatening in the context of a survival situation.
No matter what you might think about it personally, personal cleanliness and hygiene is a strictly practical matter of survival.
You can improve your own chances of survival and keep people in your group happier and disease-free with very little comparative effort and next to no resources. Make sure you are planning accordingly.
Differences between Pre- and Post-SHTF Cleanliness Routines
If you look at your own body as a piece of equipment that must be maintained like anything else in your survival stash, we’ll come up with three primary areas that need care.
Those areas are the exterior, our skin, the stuff that grows on the exterior, our hair and the interior which is your mouth and teeth. Each of these areas requires a specialized care routine to stay clean, fresh and healthy.
As I mentioned above, I won’t lie to you and tell you they will enjoy the same level of care that they get every day. They probably won’t. If you can pull that off during a crisis, that’s great, but you shouldn’t expect it.
At any rate, that level of meticulous cleaning and pampering is not entirely necessary to prevent the bulk of diseases, maladies and potential ailments that would result from them.
Some elements of your day-to-day care routine may even be excised entirely. For almost everyone, shaving is one of those things, and there is rarely any harm that comes from forgoing shaving entirely. Yes, even for the ladies, as awful as that is to contemplate.
In general, you won’t have to engage in your cleanliness routine every day or perhaps even every other day.
You may not actually have a choice: if soap, water and any other supplies are in scarce supply, you may only manage every three or four days, or even once a week.
If that is all you can “afford” then you should still do it, and attend to each part of your body with the same level of care and concern that you would on any other day. Staying clean is simply too important to do anything less.
Chances are good you won’t be taking a proper bath or enjoying a hot shower like you always do, either. You can make do with tub of cold water.
But if you don’t even have access to water, or have any water to spare you can clean up with something as disposable as a baby wipe. If you lack even that you can use hand sanitizer or body powder.
Even a quick “bath” which is really nothing more than a spot cleaning with a wet rag is a huge improvement over not bathing at all. Yes, you may be a little more fragrant than usual.
Yes, you probably won’t feel quite as clean. Your hair may feel a little oily or greasy. The standards for “clean” might have fallen a little bit, but you’ll be doing it for the same reasons.
The next sections will address all three areas of concern on your body and provide you with ample guidance, procedures, supply lists and tips and tricks for getting clean in austere environments or in the aftermath of a disaster.
Personal Care
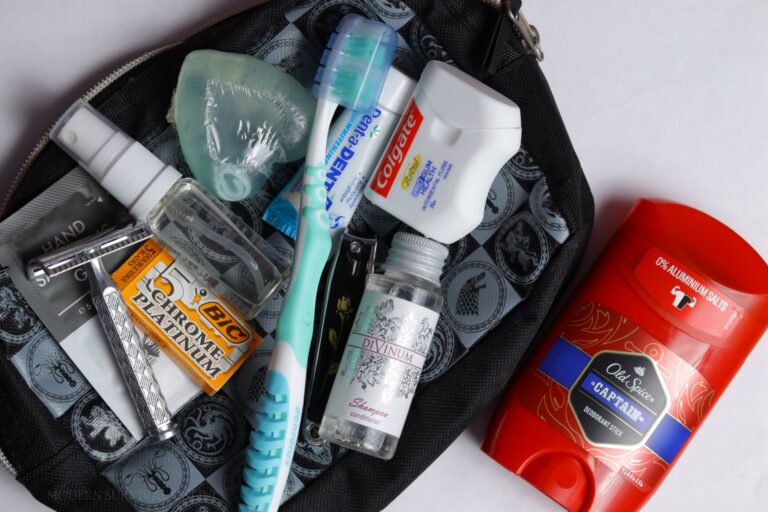
You’ll need some bathing supplies on hand during the crisis just as you do right now. Make sure you add the following items to your roster of survival goods.
- Soap: Good, old fashioned bar soap. Adaptable, long lasting, cheap. Buy a bunch. Even better, learn how to make it yourself.
- Rags: Clean, simple rags. Nothing fancy. You’ll be going through these pretty fast even if you are able to launder them so keep a goodly supply handy.
- Baby Wipes: For quick wipe-downs and no-water washing. Supremely useful. Also handy for employing as disposable “pre-washes” of the nastiest areas on your body.
- Hand Sanitizer: Buy a mega economy bottle or a bunch of smaller ones. When you just need to get your hands clean or are truly desperate to wash, you can use this stuff in a pinch. Also air dries rapidly so no rinsing required.
- Spray Bottle: Not for watering your plants or training your dog. If you are forced to or prefer to be super miserly with your water supply, you can use a spray bottle to mist yourself prior to scrubbing down.
- Pressurized Chemical Sprayer: Still one of the most convenient portable showers. Handy for rinsing hair and caked on grime.
- (Optional) Large “Farm” Tub: Essentially a trough, a large metal tub can be filled with water and left outside as a convenient and efficient improvised bathtub. Not strictly necessary depending on your survival plan, but for those who are bugging in or heading to a remote BOL it can work wonders.
Bathing
Bugging out or bugging in, staying put or on travelling on the road you won’t need much to bathe. A clean cloth and a vessel of clean, or “clean enough” water is all it is absolutely required.
Soap, of course, helps so you should endeavor to keep some on hand as part of your preps. in a pinch, you can use a small bowl of cold water if you have to.
Even if you have access to larger vessels to bathe in- an actual bathtub, a livestock trough or something similar- you should not do so lightly and unnecessarily if your water supply is limited.
The most important thing to keep in mind for procedure when it comes to bathing is that you should wash your body in order starting with the least dirty places and progressing to the most dirty places.
There are a couple of reasons for this. Number one, this will help keep from spreading germs all over your body. Number two, it will help your washcloth last longer and be easier to launder.
It probably seems to you like a small or inconsequential thing, and maybe it is, but I promise you it does make a difference in the long run.
To begin, start with washing your hands. This is mandatory particularly because your hands are most likely to contain all kinds of germs or even viruses. You definitely don’t want any of them all over your face!
Next, you can go ahead and wash your face. Our face is one of the cleaner parts of the body, and we are going to do everything we can to keep germs away from our eyes, nose and mouth.
After you wash your face, move onto your arms (not your armpits, yet!), then your torso front and back, then move on to your legs, then clean the soles of your feet before heading north again to clean your armpits.
Finally, double-back to your groin area and then lastly your rear end.
Generally, the areas towards the middle and end of that list will be the dirtiest on our bodies and the host to the most bacteria.
The reason why is simple: those stereotypically dirty areas are either for expelling waste from the body, are ones that sweat profusely or are ones that stay in the dark (meaning that germs will grow and multiply there rapidly). In the case of your groin and your buttocks, they are all three!
Speaking plainly, you don’t want to scrub the crack of your butt and then wash your face with the same cloth, do you? Didn’t think so.
Here’s a tip: if you have any kind of disposable cloth that you can make use to pre-clean your groin and buttocks (baby wipe, anyone?) before re-scrubbing it with your primary washcloth, this will do even more to keep germs at bay on your primary cloth and rest of your body, making it easier to launder and more sanitary overall in the long run.
Hot Baths are Possible!
Assuming you have an ample supply of fuel for heating and enough water, hot baths are possible! At least, something resembling a hot bath.
The easiest way to get a hot water bath in an austere environment it simply to heat up water in an appropriate container.
If the water is clean or reasonably clean, meaning suitable for bathing with, you don’t need to heat it up to boiling. That will only waste time and fuel and is likely unsafe as you’ll risk burns to make use of it.
Once your container of hot water is ready, you’ll need to work quickly as your water will cool off fast.
Grab your washcloth and carefully dip it into the hot water, allowing it to wick up in the cloth itself.
Ring out the excess so the cloth is wet, but not sopping wet. This will ensure you air dry quickly.
Now, wash off your body in the order prescribed above pausing every so often to wring out and re-wet the washcloth. You should of course lather it as necessary if you have soap.
When done, rinse off any soap residue with water alone.
That was refreshing! Now you can dry off with a spare cloth or towel if you have one, or hang out for a moment and air-dry. If you didn’t get yourself dripping wet, you will dry quickly using this method.
Bathing on a (Water) Budget
Let’s say you were fortunate enough to have a supply of water for drinking and personal hygiene in the aftermath of disaster, but you don’t have enough to bathe willy-nilly even using the conservative method above.
What should you do? Well, there are a couple things you can do, but my favorite and most effective method is using a spray bottle to mist yourself before lathering up.
This technique could not be simpler. All you’ll do is take a spray bottle, one that is clean and has not contained, at any point, any chemicals and use it to mist the trouble spots on your body before scrubbing them with a similarly damp cloth.
You can easily heat this bottle up with no risk by leaving it in the sun or near (but not too close to) a fire.
You can supersize this option for even better effectiveness with the jumbo sprayers typically used for the spraying of herbicide or pesticide. You know the ones that can be pressurized by pumping them.
These make for pretty handy portable showers, believe it or not, and you can actually generate enough pressure at close range to spray off pretty cleanly using minimal water.
Once again, you must ensure no chemicals of any kind wherever stored in the sprayer before using it for this purpose!
You might risk some serious skin irritation or worse if any of the jug’s prior contents leach out into the water you are using to take a shower!
Another way to save on wasted water for bathing is to make use of the large farm tub mentioned above. These handy multi-purpose containers can be had in sizes large enough to allow an adult to fully sit down and even recline in them.
It is possible, with a little care, to get several good baths out of the water in the tub before it gets a little too questionable to reuse for personal hygiene.
Even better, left in the sun on a warm day these metal tubs can heat up the water within a surprising amount, making a real warm bath possible even in an austere environment!
If water supply and availability is a minor or non-issue for you definitely consider one of these tubs! They can be purchased at any rural supply or farm & feed store.
Desperate Times Call for Desperate Bathing
If things are looking truly grim, and I mean desperate, you can forgo water entirely for bathing in lieu of other substances.
Baby wipes are a favorite among members of the military, hikers and anyone else who’s going to be out in the backcountry or wilderness for extended periods.
Containing moisture, mild soaps and another cleaning agents a good wipe down and scrubbing of trouble spots with baby wipes sure beats going without bathing entirely.
One “hobo-approved” method if you get really filthy is to hit your nasty spots with alcohol-based hand sanitizer or foaming soap alone. Be warned!
This is, as you’re probably thinking, a pretty harsh experience and may be very irritating to more delicate parts of your anatomy. People with especially sensitive skin may well get lit up doing this.
If you have any doubt about your skin’s ability to withstand this harsh treatment, use a small dab of the sanitizer or soap to test an area on your body (a small area!) before committing to a full wash down.
Even if bathing becomes positively unpleasant, it still must be done in service of the greater goal- staying alive!
Cleaning Hair
Typically, the cleaning of hair on the head is far more involved and consumes more water and resources than merely washing your body off.
Proper care of the hair involves shampoo and conditioner, with both being worked into the hair with copious amounts of water and rinsed with even more water.
Shampoo and conditioner are both likely to remain in the hair and on the scalp if you do not thoroughly rinse your hair out. This is especially problematic for people with long hair.
But there is good news. In almost all situations, your hair can remain in good shape longer than your body, at least when it comes to odor and harboring germs.
Even in normal times, washing your hair every day is not recommended. Every other day will do, but you might have to go for longer in a survival situation.
Everyone has natural oils in their hair that, over time, will stabilize and turn unkempt hair from a greasy mess into silky, natural-looking locks that more or less take care of them after a lengthy period without washing.
That being said, if you have the water to spare it’s a good idea to wash your hair every now and then, if only to get your scalp good and clean.
A large enough vessel will allow you to dunk your head, swirl, scrub and then rinse your hair in one fell swoop. Any body of water large enough for you to properly bathe in will allow you to submerge and do the same thing.
Barring that, you shouldn’t try to do anything like pouring water over your head with a bucket or a bowl as it will waste far too much water and is too inefficient to consider under most circumstances.
If you’ll recall the large pressure sprayer that I recommended in the section above, that can be handy for rinsing short hair without wasting a ton of water; longer hair will still be troublesome.
This is not to say it’s impossible or you can’t do it with a sprayer, but it’s going to take a lot more work and a lot more water still.
In fact, the extra care needed to keep long and luxurious manes in good shape during a crisis is one of the best possible arguments for whacking off that long hair if you know you’re going to be surviving for “the duration.” Short hair-don’t care” applies to life after a disaster, too!
Alternative Shampoo Methods
I will freely acknowledge now that some people are simply not going to be happy if they’re unable to wash their hair.
The initial “grungy factor” of allowing hair to acclimatize to its natural state using the oils it naturally produces is probably a bridge too far for some.
If this describes you, and you don’t want to waste water on shampooing your hair or water is still too scarce to countenance such a thing, you still have options.
One technique that is reasonably effective, if a little messy, is to use body powder and massage it into the hair using both hands. Make sure you get down to the scalp and thoroughly coat the entirety of the hair on your head.
Once this is done, shake out the excess, then comb out the hair rigorously. It won’t look clean, but this will definitely help clean your hair and scalp along with making it smell better and stay fresher.
On the other hand, you will look like you have the world’s worst possible case of dandruff, but between you and me we will know you have clean hair!
This technique will never replace a proper shampoo and rinse for cleaning hair but it doesn’t waste water and can afford you a lot more time between shampooings.
Mouth and Tooth Care
Considering how easy it is to care for your teeth on the go, and how little room the proper supplies take up, the notion that you would jettison your toothbrush and toothpaste along with floss seems crazy to me.
You can carry all three items for a few scant ounces in weight, and if you’re that pressed for room you can even chop off the handle of your toothbrush a little bit to shorten it.
And another thing! You shouldn’t be without floss anyway, since it is one of the strongest threads you can have in a pinch and is good for all kinds of things besides cleaning between your teeth.
Back on topic: I shouldn’t have to give you any instructions on how to brush your teeth. I’ll presume you’ve been doing it your entire life and you don’t need me to tell you how.
If you have an abundance of supplies, perhaps you’re bugging in or living in a well-stocked bug-out location, brush your teeth at least once a day. If supplies are scarce, you might go to every other day.
Naturally, this wouldn’t be much of a survival-related article if I couldn’t tell you how to improvise things you need.
If you run out of toothpaste, you can use baking soda or coarse salt along with your toothbrush and a little water to scrub your teeth down. Be warned, salt may be harsh on your gums and cause bleeding.
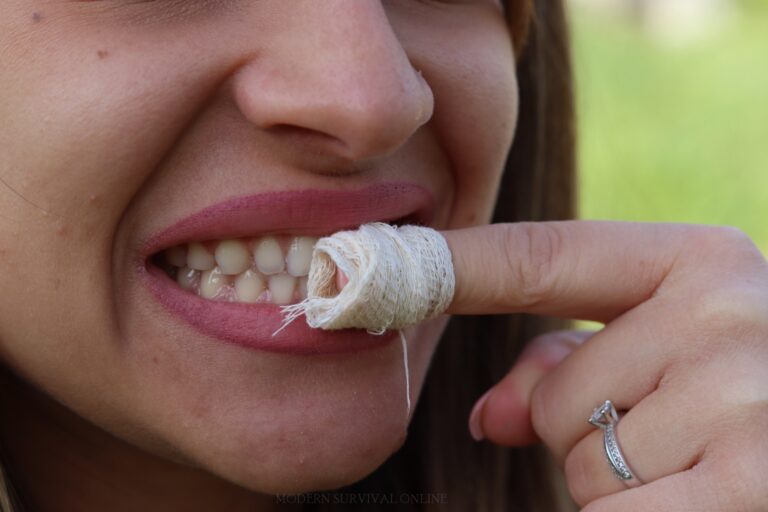
If you’re missing a toothbrush you can use a clean rag just for the purpose that you keep laundered to buff your teeth using toothpaste or any of the alternate materials above. You can also use a gauze pad as a toothbrush.
No matter which combo you settle on, swish and rinse with a little water if you can.
Now, a toothbrush is something that’s a little harder to field improvised, but it can be done. I’ll say here before going any farther that you should not trust any unknown brush you find that is approximately toothbrush shaped.
You don’t know what it was used for. What if someone was using that as a gun cleaning brush, or to detail scrub their toilet? Nasty!
One old frontiersman trick you can use to craft a sort of toothbrush begins with locating a round, slightly green twig that’s about the diameter of a large pencil.
Cut off the end of the twig square and then make two right angle cuts into the center of the surface approximately 3/8 to 1/2 an inch deep.
After this, chew on the end of the branch and scrape it on any clean abrasive surface to fray the ends. Repeat both of these actions until the fibers of the woods sort of resemble a fuzzy pom pom.
The fuzzy end should be fairly soft to the touch and can be used as a pretty good improvised toothbrush!
It should go without saying, you must be positive you are not using a poisonous plant for the purpose, or you will pay dearly for it. If in doubt, don’t do it!
Most of you probably rinse your mouth with mouthwash as part of your usual teeth-brushing routine, and it is not a bad idea to keep a stock on hand as part of your survival stash.
But have you thought about what you’ll do if you run out? Mouthwash isn’t one of those things you can just whip together at home, right? Wrong!
DIY mouthwash can easily be crafted at home with the right ingredients and a jar. You can even improvise it out in the field with minimal ingredients!
Homemade mouthwashes making use of fresh herbs and essential oils can do a great job of cutting down massively on the amount of bacteria in your mouth along with making your breath smell fresh and clean.
Brushing your teeth in a SHTF situation is not just in quest of getting fresh breath. Neglecting your mouth and your teeth may result in some truly awful gum disease and other oral problems.
Either can quickly lead to infection and debilitating pain. As might be expected, it won’t take any time at all before you develop some truly heinous halitosis. Take good care of your teeth and mouth!
Survival Laundry
It might sound a little ridiculous when you stop to consider what you’re up against in a long-term survival situation, but you need to know how to do the laundry when you can’t just turn on the washer and dryer or head down to the laundromat.
Dirty, rancid clothing can exacerbate bacterial growth and skin conditions on an already dirty body. Also, dirty clothes do not heat or cool as well as clean ones, so there’s a performance incentive to keeping them laundered.
The biggest concern for most preppers when it comes to doing the laundry when water is scarce is that doing any amount of laundry consumes huge amounts of water.
Sure, you can make use of a relatively clean pond, river or lake to do the wash but that might not always be accessible, and your container stores of water are probably not best spent on doing a load of clothes or towels.
If you have that much water to use, great, there are some easy field expedient methods of doing the wash. If you don’t have that water to spare, you have to get a little more creative, but it is possible to freshen up your clothes and kill any germs in them using no water at all. Believe it!
A traditional method for washing clothes in an austere environment is just to dump them in a tub of water with some soap in it, swirl them around, run them over a washboard and wring them out before hanging them to dry.
Old school! If you lack even a washboard, you can do what your great-great-grandparents did and give the clothes a wash before beating them out against a flat rock.
As you might expect, this method is absolutely hell on your clothes, and will wear them out quickly.
But let’s say you don’t have any water to spare for washing your clothes. What are you supposed to do, just let your clothes get increasingly filthy until they are starched stiff?
No, we have better options. One method works particularly well almost everywhere that you’ve probably never heard of is sun washing.
The soil contaminating your clothing is comprised of actual dirt, body oils, dead skin cells and other substances that your body is leaking pretty much all the time.
This biological soup will host all kinds of germs, gribbly germs that, when kept against your skin, will cause irritation, rashes and all sorts of maladies.
This general dirt and debris also blocks the spaces between the fibers of your clothing on a nearly microscopic level.
This impairs airflow, which means that your clothes won’t keep you warm or help keep you cool as well as they would if they were clean.
That where the power of the sun comes in. the sun emits a potent UV radiation and UV radiation will kill an awful lot of germs.
The germs themselves are responsible for much of the stench associated with dirty clothes so if we can get rid of those, we can get rid of the stink and keep our skin healthier.
Sun washing is a piece of cake, and you can do it anywhere where you have strong direct sunlight and a flat place to lay your clothing.
Your first step is to turn your clothing inside out scrunch it up, shake it, scrunch it up and shake it again. You might consider gently beating it out against a post help dislodge the worst of the dirt and grime.
If you were doing this in an area with good lighting, you’ll probably see a cloud of dust and dirt coming off it. That is exactly what you want.
The next step is to spread the clothing out a flat surface facing the sun as squarely as possible. Imagine if your clothing wanted to catch a tan; that’s how you want to set your clothes up for some washing.
If you can elevate them off the ground slightly that will work even better. Now all you have to do is waiting and let the sun work its magic.
It is recommended you let each side of the clothing get one full day’s worth of sunlight before flipping it.
The effectiveness of this method is highly dependent on the strength and quantity of sunlight that reaches the clothing.
Midsummer sun on a cloudless day can actually wash one side of your clothing as little as a few hours. Midwinter sun on a cloudy day may take more than one day to effectively wash your clothing per side.
But whether it happens quickly or slowly, if you can pour enough UV on your clothing you will kill the germs that dwell on the fabric. When your sun wash is over, your clothing should smell noticeably fresher and feel a little cleaner, even if it doesn’t look like it.
Sanitation for Defense against Pestilence
Sanitation differs from personal cleanliness in that sanitation is more about keeping your environment clean and germ-free. A lack of sanitation is herald of pestilential outbreaks the world over since time immemorial.
No matter the circumstances, no matter what else is going on, if sanitation starts to slip plague and disease will follow close behind.
Even during war, of all things, unsanitary conditions are often one of the major killers and causes of casualties.
More than any bursting shell, more than a supersonic bullet, tiny, invisible germs are among the most lethal things that can be encountered.
One of the most common and the most life-threatening ailments that can afflict you in an austere environment is dysentery, and you can bet dimes to dollars that it will show up when your environment is dirty and filthy and you’re forced to live in it.
Dysentery is an inflammation of the intestinal tract that can result from a variety of bugs. Bacteria, viruses, amoebas and parasites can all cause dysentery.
No matter how you catch it, dysentery promises you abject misery and life-threatening dehydration resulting from uncontrollable, stomach-cramping, body-racking diarrhea.
Near constant loss of fluid and electrolytes will often result in systemic shock that will further complicate the health problems caused by dysentery, or that can even kill you by itself.
This is no mere stomach bug. It’s a nasty thing to consider, but dysentery is typically contracted from pathogens that dwell in or on human or animal fecal matter.
If you think this through, a lack of proper human waste disposal is the number one contributor to most cases of dysentery.
Worse, dysentery is communicable and that means once one person in your group catches it there is a good chance everyone will.
Consider this in the context of the greater survival situation. You’re living in the aftermath of some major disaster. There’s no trash service. There is no sewer service.
You can’t just flush your toilet and have it ferry away your leavings. That waste certainly can’t stay there, at least not for long, without severe consequences. It has to go somewhere, and that means you have to deal with it.
If you’re planning for any long-term or indefinite duration survival scenario and you have not planned to deal with copious amounts of human waste you’re planning to fail, and quite possibly die of preventable disease.
Dealing with Human Waste
Modern life has made us all soft. the skills and procedures that were once just a part of, you know, life are now the stuff of survival lore thanks and how prosperous and advanced our civilization is.
Dealing with the dirty nastiness of the very processes of life has become the stuff of nightmares, not the stuff of daily chores.
I don’t think I’m reaching when I say we are all very thankful for that, but if you want to be truly prepared for a society altering event, you had better work on learning and mastering these skills.
I’ll be honest with you here, reader: the following sections are hard to read and pretty gross. You’re probably going to be learning things you wish you didn’t have to learn.
But they are the dirty truth. I’m talking about the measurable metrics of Number 1 and Number 2.
Without these numbers, you don’t have specifics. Without specifics, you cannot craft a decent plan. Put on your rubber gloves, hold your nose and let’s get started.
The Numbers
Have you ever stopped to consider just how much pee and poop a human generates every day? I don’t blame you if you haven’t, but unfortunately this is where that happy ignorance dies.
An average adult human being will generate and leave behind anywhere from three-quarters of a pound to one full pound of feces every single day.
That same adult will generate and drain two to three pints of urine. That’s a fair bit of waste to have to deal with. Certainly more than the family dog or cat creates, right?
Mercifully, in normal times, we have the miracle of indoor plumbing and our faithful toilets to deal with it.
Now stop to consider how much more impactful those numbers are when multiplied by the number of adults you have in your group inside your immediate dwelling. Pretty awful to think about, huh?
Let us assume that the toilets do not work at all. At. All. It is now up to you and the people around you to physically handle and deal with over four pounds of feces and over one gallon of urine every single day.
The Consequences of Filth
As awful as that is to contemplate, remind yourself that things can always get worse. What if you had to deal with that much waste and you were forced by circumstances to stay indoors?
You got it, friend: we are now truly in “oh shit” territory. Let’s continue. As unendurable, unimaginable and disgusting as it sounds we aren’t even to the worst part yet.
Let’s also say you are unable to properly store or dispose of that waste. Waste that is exposed to the open-air will attract insects and animals like, well, like flies to shit, and this is where things get truly heinous.
All kinds of animals and insects, including your household dogs and cats, are attracted to feces and will get into it.
Any animal that touches the feces will spread it and the germs that it carries to any other surface that it touches. A living, breathing tail wagging vector for potentially deadly pathogens.
I don’t think I’ll need to explain to you just how dangerous the spread of sickness and disease that erupting from this event will be. I can assure you it will be nothing less than catastrophic.
Those who do not contract an illness directly will contract it from the first victims who fall ill.
Child, adult or elder all will be laid low barring a miracle, those who are very young and the very old will suffer the worst as they always do.
Under the circumstances, several will die without a miracle or expert medical intervention.
And here’s the plot twist: that nightmare scenario I just described to you can spawn from just a couple of days without proper disposal of human waste.
Now I ask you to imagine a week without it. Imagine a few weeks. Imagine a month. I say this with all humility: most people cannot truly comprehend how bad it can get.
Don’t worry reader. We won’t let that happen. In the following sections I’m going to provide you with all the plans and procedures you need to keep that nightmare from becoming reality.
Take a deep breath, perhaps wash your hands just to be safe and let’s move on.
Emergency Waste Storage and Primitive Toilets
There are many ways to improvise usable toilets and waste storage for both indoor and outdoor survival scenarios.
When you’re talking about proper sanitation, you are concerned with either storage options or disposal options. They are not synonymous.
A disposal option is more permanent, a way to send waste to its final resting place so you need not worry about it anymore. You can think of it more or less like doing your business on any other day.
When you are done, you clean your backside, pull up your britches and go about your day.
A storage option is a temporary measure, either for the long or the short term. Any storage solution you come up with will, eventually, have to be emptied of the accumulated waste for safety and to make room for more incoming.
This may have to occur daily, or less frequently depending on both the nature of your emergency, and the nature of your storage solution.
Instead of getting into the minutiae of both of them, it is somewhat easier to think of improvised toilets as either indoor suitable or outdoor suitable. Some options can work in either setting.
Some only work in one or the other. No matter what your plan is, it pays to learn several options from each list, so you can adapt to changing situations and curveballs.
You also definitely want to have the right stuff on hand to make dealing with doing your business a little less disgusting. I have prepared a handy shopping list for your prepping below.
- Toilet Paper: Toilet paper is one of those things that you can improvise in the field, but nothing works as well, or is quite as comforting as the real thing. Make sure you have a mountain of this stuff in your stash.
- Improvised TP: Maybe you ran out. Maybe you’ve started preparing too late. Whatever the case, you don’t have any real toilet paper but still need something to wipe your butt with. You can make use of some of these tried intrude items below for the purpose.
- Newspaper
- Rags
- Cut strips of cloth (old t-shirts, tablecloths, etc.)
- Pages torn from books.
- Live leaves (BE 100% SURE THEY ARE NOT IRRITATING)
- Flat, smooth rocks
- Baby Wipes: You should also have a goodly supply of these if you finished reading the section above on personal cleanliness. These are just as effective at getting extra clean when you’re done doing a Number 2.
- Bleach: Common household bleach is a prepping superstar. You can use it to disinfect water, and also use it absolutely nuke germs on contact. In a pinch, you can use a bleach rinse to get your hands clean after doing your business. Make sure you have several gallons of the stuff on hand. And that is straight bleach, no fragrances, no thickeners, no nothing. Just bleach.
- Can Liners: Extra thick heavy duty can liners are a godsend when you dispose of nasty human waste. These will serve as your catch container in improvised toilets, and are infinitely handy for cleaning up all kinds of serious messes, or keeping them from getting out of control. Don’t skimp on these: buy the thickest ones from the best manufacturer you can find.
- Odor/Moisture Control Medium: For improvised waste storage and indoor toilets in particular you want to have something on hand that can help keep moisture and odor at bay. You have several options for this: Kitty litter is one, as is a quantity of fine sawdust, ash from a wood fire or common quicklime. In a pinch you can use finely shredded paper (newspaper works well) or even sand.
Now that you have the necessary supplies, let’s get to the matter at hand.
Improvised Toilets: Indoor Solutions
You have only a few options for an improvised toilet if you are staying inside a structure, but they are effective.
You’ll have more flexibility and toilet options if you can work outside, and if it is an option I generally recommended you do so, saving an indoor toilet for perhaps the very young and the infirm, or for midnight movements.
Indoor toilets will by design require a little more effort from you for odor control, siting and regular emptying.
That being said, they do work well and can get you through even a prolonged crisis with your sanity intact. Check out the designs below.
Bucket Toilet
If you were a prepper, I’ll bet any amount of money right now you’ve already got a stack of those quintessential plastic hardware store buckets. You know the kind with that heavy duty lid?
As it turns out, they really do have endless uses, and one of the entries on that list is in fact indoor toilet. You can think of this improvised toilet as a sort of modern spin on the venerable idea of the chamber pot, common in the days before indoor plumbing existed.
the setup could not be simpler: take your bucket, line the inside of it with one of those heavy duty can liners I told you to get in the list up above, secure the liner with a clamp, a bungee cord or something similar, attach a purpose made toilet seat or make one from scrap wood, and you are ready to go!
If you are handy, you may want to construct a better, separate seat, with a hollow opening that is positioned directly above the bucket, and that way you don’t have to crouch low on the bucket when you need to do your business.
Your bucket toilet is ready to go as it is, but I recommend you improve it by adding a little bit of odor and wetness control medium to the bottom of the bag.
After you are finished, you should add a little more medium over the top of your leavings to help seal in odor. You can also spread a little disinfectant or bleach in there on top of it to get a jump start on knocking germs and odor down.
Be very conservative on filling up your toilet: don’t let it get a little too full for comfort and easy handling! I can promise you you’ll regret it if you have an accident.
When it’s time to change out the liner, all you need to do is carefully tie off the bag if desired and then you can tote the whole thing to your dump site or to a larger, fixed waste storage container for the purpose using the handle on the bucket before dumping the whole thing in to be dealt with another time.
Your larger storage can could be a full size trash can set up similarly to your bucket toilet.
You should make it a point to add some odor control medium to every deposit as with the bucket and similarly treat it with bleach or disinfectant as above.
Taking care to maintain your large storage container as it fills up is essential for keeping odor down and keeping pests at bay.
After that, all you need to do is reset your toilet: spray it down with disinfectant, add some odor control medium to it, and replace the seat. Back in business.
Make sure you follow your mama’s advice and wash your hands thoroughly after dealing with any toilet related business. More on that later.
Conventional Toilet
I know I just told you that you’ll be dealing with this because your typical toilets won’t be working. But before you light me up in the comments, hear me out.
It is not an impossibility that you might have no water supply to the fixture but the sewer system may otherwise be functional.
This is something you need to make absolutely sure of before you attempt this, but if that is the case you can fill up the toilet manually.
This also requires quite a bit of water; if you don’t have any water to spare or cannot source it easily, skip this method.
All you need do is pour a little bit of water into the bowl itself up to its normal level for doing your business and then flush as usual. The waste should be carried off into the sewer.
If as expected though the sewer is out of operation, you may still utilize the toilet itself as a sort of seat with a bag placed in the bowl for waste collection as with the bucket toilet.
Be advised the capacity of a toilet bowl is less than a 5-gallon bucket, which means you’ll be taking out full waste bags more regularly. Duct tape is helpful for keeping your liner in place.
Using the latter option is a fairly good idea for those who are infirm, or otherwise have trouble using a bucket toilet.
Primitive Toilets: Outdoor Solutions
With nothing more than a shovel and more than a little hard labor, you can create an adaptable, reusable outdoor toilet.
Outdoor toilets have the benefit being reusable multiple times, and if well sited and created correctly they do not need to be emptied; you can just fill dirt in over top of them.
While easy to learn and simple to make, there are some additional requirements before you just go digging your perfect outdoor throne anywhere that suits you.
Of prime importance knows precisely the water table in your area before digging and using any in-ground toilet!
Solid and liquid human waste can easily contaminate in-ground water sources, or drain to above ground water sources like rivers, lakes and springs.
If it is at all possible you must take pains to site any outdoor toilet as far away from those water sources as possible, and furthermore well away from any underground tributary or aquifer.
Consider 200 feet the minimum standoff distance to situate an outdoor toilet from any other water source.
If you have any doubt at all, or are unsure about your ability or the water table situation use one of the indoor toilet options above and keep it outside for convenience and odor control.
But have no fear! With a little bit of prior research, know-how, and the guidelines I’ll provide you just below you’ll have an outdoor toilet suitable for royalty in no time!
Outdoor Toilet Designs, Siting Requirements and Specifications
No matter the design, any in-ground toilet must be at least 12 in deep. Depending on the conditions and climate affecting your local soil, this may be a cinch or it may be very difficult digging.
Do what it takes to reach the 12-inch minimum and go a little farther if you are able. If you find the digging too hard, try a new site that still meets the above requirements.
You also need to concern yourself with drainage. Underground water is not your only concern when choosing a site for your outdoor toilet.
You also must take into account the flow pattern and path of above ground water that may inundate your toilet from rain or flood.
The resulting muck can travel far and fast, contaminating everything it touches. Make sure it isn’t your dwelling, and definitely make sure it cannot reach any above ground water source.
Keep these two principles in mind as you read over the following outdoor toilet designs below.
Slit Trench
This is a larger outdoor toilet design they can easily handle multiple adults, and can be expanded based on the number of people in your group if desired.
You’ll be putting in plenty of effort to dig a slit trench in anything but the softest soil, but the good news is once you have it dug, and the associated accoutrement installed, it’s going to be quite a while before you need a new one.
A slit trench should be about a foot deep by a foot and a half wide. The length of the slit trench is variable, but a good standard is 4 feet long.
All you need to do to relieve yourself in a slit trench is to squat over it and let nature take its course.
I will offer you this one Pro-Tip though: consider adding a railing on one side of the trench, or potentially a post with a rope handle on it to provide a little extra stability when nature calls.
This is especially handy for children and the elderly, but you’ll appreciate it yourself if you ever had the misfortune to stumble and fall into a used slit trench.
Simple Hole
Or cat hole. There’s really nothing to this one except what it says. Dig a hole no wider than is necessary and about the prescribed 12in deep.
This will give you enough room in the hole to make use of it several times. Squat or stand over it as is needed and do your thing. Once you’re finished with it, simply fill the hole in with dirt.
Alternately you can construct a seat over a hole you’ve dug to give a little more comfort if you ever have to take your time on the loo.
Washing Up After You Are Finished
Thoroughly washing your hands after using the bathroom is even more critical in the midst of a SHTF situation.
Despite the change in circumstances and despite the change in, ah, the facilities you use nothing really changes for washing your hands. The only limiting factor may be limited access to water, or even soap.
After you’ve done the deed, make sure you wash your palms, between your fingers, under your nails and all the way up to and beyond your wrists thoroughly with soap and water.
Pay attention, scrub thoroughly, get in all the nooks and crannies, and then rinse with fresh water. If your water supplies are too precious to squander on hand washing you should plan on keeping a substantial supply of hand sanitizer as part of your survival stash.
If you’re using hand sanitizer, you want to put a nickel- to quarter-size drop in the middle of one palm and massage it briskly into your hands until it is dry. Take care of hit all the same areas you would if you were using soap and water.
But let’s say that things have gotten really grim. Really, really grim. Grim enough that you cannot spare a single drop of water, you don’t have any hand sanitizer, and you sure as heck don’t have any soap.
Well, that isn’t going to stop nature from running its course, that’s for sure, so that means you’ll still need a way to wash your hands. Once again, bleach to the rescue!
to make your own hand sanitizing bleach solution, you want to take one tablespoon of plain, undoctored, unscented household bleach that is anywhere from a 6% to 8.5% solution of sodium hypochlorite and add it to 1 gallon of water.
Again, that is 1 tablespoon of bleach to 1 gallon of water. The resulting mixture should smell strongly of chlorine.
Note, this is a far stronger solution than is typically used for sterilizing water to make it safe to drink. Don’t drink this brew!
Now all you need to do is dip your hands into the solution you made and rub briskly all over just like you’re washing your hands with soap and water.
Do this for at least 30 seconds, then shake your hands free of any residual liquid and dry them.
Note that the bleach cleanser you made is not evergreen. Bleach begins to break down in contact with air, and if you cannot smell the bleach in the solution, it doesn’t have much cleaning power left.
That means you need to refresh the solution regularly. You should also pour it out and redo it if the water starts to get cloudy.
Just like you wouldn’t keep wiping your butt over and over with the same dirty piece of toilet paper, don’t keep washing your hands in the same dirty water, even if it has bleach in it.
Also, parents: make sure you’re staying on top of your kids after they use your improvised facilities. As gross as it is, some people get lazy with proper hand-washing hygiene even in the best of times.
This is far more likely when everyone is stressed out from fighting for their lives. Don’t slacken, and make sure all members of your group or family are staying on top of keeping their hands clean.
Disposing of Trash
Disposing of human waste isn’t the only thing you’ll have to keep up with in a long-term survival situation.
As I alluded to above, your weekly trash service will not be running. Getting rid of any garbage that is just in the way, or potentially biohazardous is completely up to you.
You can only cram so many bags of trash in your garbage can till you can’t even get the lid to go back on. If a situation is going to drag on for a very long time, disposing of garbage will become a chore that must be attended to regularly.
And before you think you’ll just throw the bags of garbage in a pile on the back corner of your property, consider that mounds of refuse are another historical harbinger of disease outbreaks.
Rodents and insects of all kinds are attracted to garbage, and once they get access to the rotting, moldering scraps within they also turn into vectors of pestilence.
It doesn’t have to be food scraps and bloody bandages either; rotting paper and cardboard can host colonies of mold and other microorganisms that will really make you sick if you get exposed to them.
Bottom line, trash is bad news and you don’t want it near your living quarters.
So what to do? Your answer probably depends on how much land you have access to, and what you can do with that land without potentially pissing off your neighbors, if applicable.
Organic scraps and food, things like vegetable peels, fruit rinds, bread crusts, leftovers and things like that can be composted.
Aside from minimizing waste and creating useful fertilizer, the decomposition process of composting helps break down organic matter in a way that is less dangerous than letting it sit, rot and fester.
Another option is to create a dump. Chances are they’ll be some site near where you are living in the aftermath that is far enough away from yourselves and other habitations that you can just use it as a dump.
It isn’t ideal, but what is most important is you move potentially hazardous garbage as far away from you as possible. A daily or weekly dump run will very likely be a prerequisite for your continued existence.
If you are really, really preparing for the long haul you might consider digging a pit in anticipation of turning your dump into a landfill at a later date.
Your last option is burning. Burning garbage is anathema in today’s climate conscious times, but has historically been used for ages.
Anything that is potentially biohazardous is a good candidate to burn, as it ensures complete destruction of any nasty pathogens and completely destroys the potential source.
Now the potential vectors, like people and animals, cannot make contact with it any longer. Certain kinds of garbage like paper, cardboard, scrap wood and similar materials can be burned for heat in barrels or fireplaces.
Do take care of when burning anything else like styrofoam, rubber or plastic, as noxious chemicals will be released that can hurt your short- and long-term health.
And as always, any kind of burning fire releases copious amounts of smoke that can be seen for miles and miles around. If you’re trying to stay on the down-low, this is probably not the best way to dispose of your garbage.
As always, you’ll need to assess which method is the best for your requirements and your current situation.
Conclusion
In any long-term survival situation, particularly one where you are sheltering in place for the long haul, it is not raiders, invasion or any threat like that that will pose the biggest risk to your health and life.
Now as always, it is a lack of sanitation and a lack of personal cleanliness that will throw open the gates and lay out the welcome mat for Pestilence, the silent stalker of mankind.
The only thing that will keep Pestilence at bay is strict adherence to proper protocols of personal cleanliness and sanitation. Use what you have learned in this guide to make sure you are keeping clean after SHTF!

Like what you read?
Then you're gonna love my free PDF, 20 common survival items, 20 uncommon survival uses for each. That's 400 total uses for these dirt-cheap little items!
We will not spam you.
Interesting advice!